Return to first Pinterest Pin page
4. Combine pictures into the Pinterest pin collage
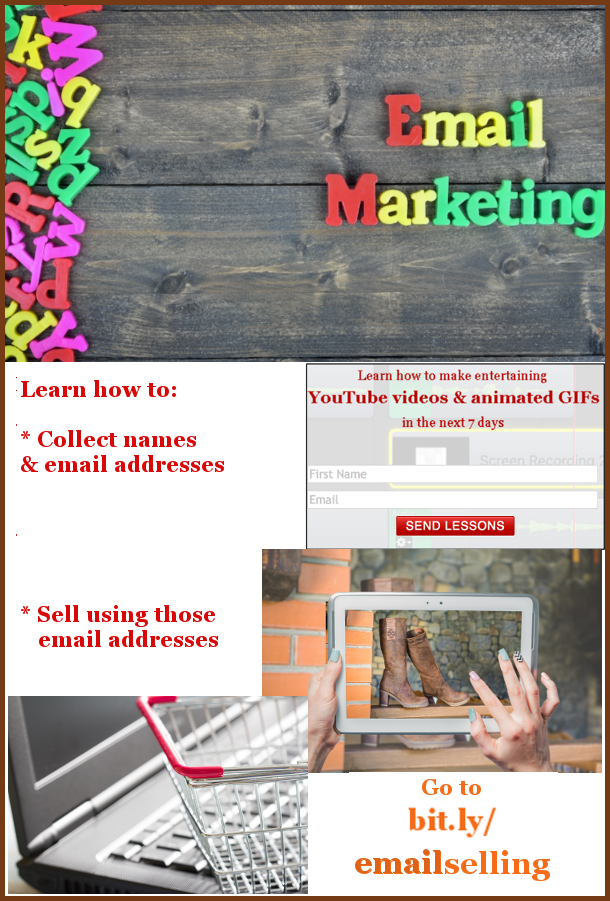
 I opened GIMP and created this Pinterest pin.
- Click File > New to make a 600 x 1200 pixel box
- Use screen capture software such as Skitch to capture copy of YouTube lesson form
- Save form with a descriptive name
- Experiment with different graphic sizes
- Copy & paste the title graphic into place
- Click foreground colour box and change colour to red
- Click text tool
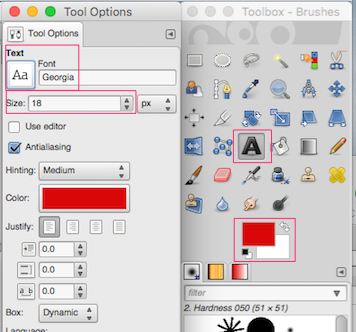 Click font icon to change font to Georgia or Georgia bold
- Click File > New to create a box with white background
- Type “Learn how…” text into message that tells people what they can be learning. Note the white space to help people understand the message almost instantaneously
- Use Rectangle Select tool to draw box around text. Make box no bigger than it has to be to include all letters
- Use Image > Crop to Selection to isolate a smaller white box with the text
- Give it a descriptive name
- Copy & paste it into the box
- Copy & paste the other 3 graphics. Note that you may have to keep experimenting with different sizes
- Change foreground colour to orange
- Select regular Georgia font
- Print “Go to” into appropriate space
- Change font to Georgia bold
- Type lines below “Go to”
- Change orange foreground colour to darker orange
- Type “email” & drag it on top of the lighter orange “email”. (Having the text in two different shades helps people recognize and remember it.)
- Use Rectangle Select tool to draw box around useful part of collage. Idea behind that is to delete excess white space at bottom
- Use Image > Crop to Selection to isolate useful part of collage
- Give it a descriptive name
- Change colour to a darker red
- Click two-headed arrow beside colour boxes. (This will make the background colour dark red.)
- Click on collage and then click File > New.
- Increase the length and height by exactly 10 pixels each
- Click OK
- Click on collage and press Cmd C to copy into clipboard
- Click on new red box and press Cmd V to paste collage on top of it
- Right-click in Histogram-Layers panel and select Anchor Layer
- You now have a collage with a 5 pixel border around it.
- Use Image > Scale Image to change the width to 600 pixels
- Make sure it has a descriptive name with the word Pinterest in it
- Export it as a PNG file
- Use the WordPress Add Media button to copy the new Pinterest pin into your appropriate web page.

Earn a percentage of the selling price for every book sold.
 Peter Enns has been developing websites since 1996. He is a social media blogger and author of a free YouTube tutorial. It’s called 7 Day YouTube and will teach you how to make entertaining videos & animated GIFs.