A new slide for each tip
Make a video with the 14 Twitter tips. The only way to get good at it is practice, practice, practice. So, scroll down on the previous page and use Skitch to capture each of the 14 images from the SlideShare presentation. After you have captured each picture, go to File > Export to save each picture with a descriptive name.
(Note: You want to prevent your pictures from being too fuzzy. So, click the arrow with 2 points in order to make your SlideShare presentation full screen.)
Drag each picture from the Finder to a new Keynote slide. For each slide, write a short description in such a way that it helps viewers remember what you said.
Keynote vocabulary
You must study Keynote and learn the vocabulary below.

 The order of each slide: 1st — Image with an iris effect and a duration of 0.75 seconds.
2nd — Text with a convergence effect. The duration will be approximately the amount of time it takes to read the text out loud.

Earn a percentage of the selling price for every book sold.
The last slide when you make a video
When you make a video for your business, you need a call to action. Here you are telling people to go to a website. They may even end up buying something there.
(Don’t make the buying part too blatantly obvious. To get blog followers, you have to give people an experience. Most of them do not want the buying part to interfere with the experience.)
You need the name of the website and the page. Above that, in much smaller text, you will have a very brief explanation of what the web page is all about. In order to tie that introduction and conclusion together, I used the same picture but without the numbers.
A convergence effect is used for the text. In my particular case, I used ScreenFlow to slow down the website domain name. I wanted it to match the voice clip that went along with it.
Adding voice clips
When you make a video, it is usually more effective to have both voice and music in each video.
 Read the text of your video into an audio recorder and save it onto your hard drive as an MP3 file.

1. Drag the MP3 file onto the timeline
2. Select it
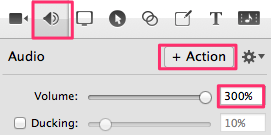
3. Click on the audio properties icon
4. Change the volume to 300% so that the audio clips easy to work with
5. Click Action > OK
6. Drag the red scrubber to the beginning and end of the flat lines, split the clip and delete the silent portions.
7. Starting at the first voice clip on the left, line it up with the the corresponding text. You will often have to split the clip and add a freeze frame so that the video portion of the words go beyond the audio portion for the same words.
There is more voice clip information in the voice clip blog post on this website.
Adding free music to a YouTube video
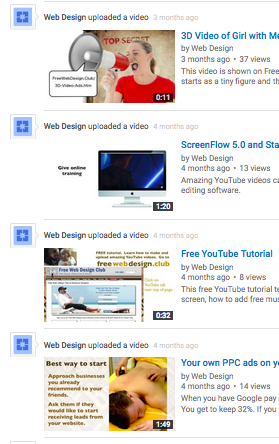
![]() Open one of your YouTube accounts and find the list of all videos in that account.
Open one of your YouTube accounts and find the list of all videos in that account.
Scroll down to the bottom, click on the “help” button and search for “free music”. You will end up with a link talking about their free music library. Simply follow the instructions.
There are dropdown arrows for genre & mood. I usually choose cinematic or classical for the the genre and happy for the mood.
YouTube has 50,000 music clips from which to choose. So, when you make a video, you have no excuse for not choosing the ideal music clip.
Listen to a number of tracks before choosing one that appears to be ideal. Download it.
Adding the music
Drag the music MP3 file from your download folder to the timeline.
You want the music to be quiet enough while someone is speaking. Then you want it to be louder when no one is speaking. The audio ducking page explains how to do that.
Note that after a YouTube video finishes, another related video will start playing. So, make sure that you add a freeze frame to the end of your video and have it continuing motionless for about 20 seconds. You want people to have ample time to jot down the website address. During this time you will have the music playing in such a way that the end of the music will be at the end of the freeze frame.
 How to upload a video to YouTube
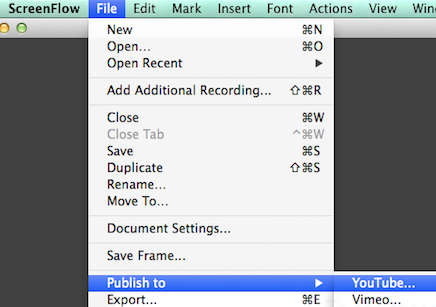
After your video is complete and saved, click on File > Publish to > YouTube. Select Next. If you have more than one YouTube channel, sign out and sign in again. You want to make sure that you are not on the wrong channel.
Select your category and then write a title, a description and the tags that will help people searching for your video. (If you are having trouble uploading, see the YouTube section of this website.)
ScreenFlow screen capture & video editing software
ScreenFlow is a professional-quality screen capture and video editing software. You can capture the motion in your Keynote presentation, shorten or lengthen the time, add free music and 101 amazing other things with ScreenFlow. Watch the video below to get an idea of how ScreenFlow works.
Search YouTube.com for lots more videos about ScreenFlow.
Buy ScreenFlow
ScreenFlow does not work with a PC. If you do not have a Mac, it may be worthwhile buying one so that you could use ScreenFlow. Considering the quality, ScreenFlow has an incredibly low price tag of $129 USD. Go to the ScreenFlow website to order.

 Peter Enns has been developing websites since 1996. He is a social media blogger and author of a free YouTube tutorial. It’s called 7 Day YouTube and will teach you how to make entertaining videos & animated GIFs.