Attention-grabbing video titles
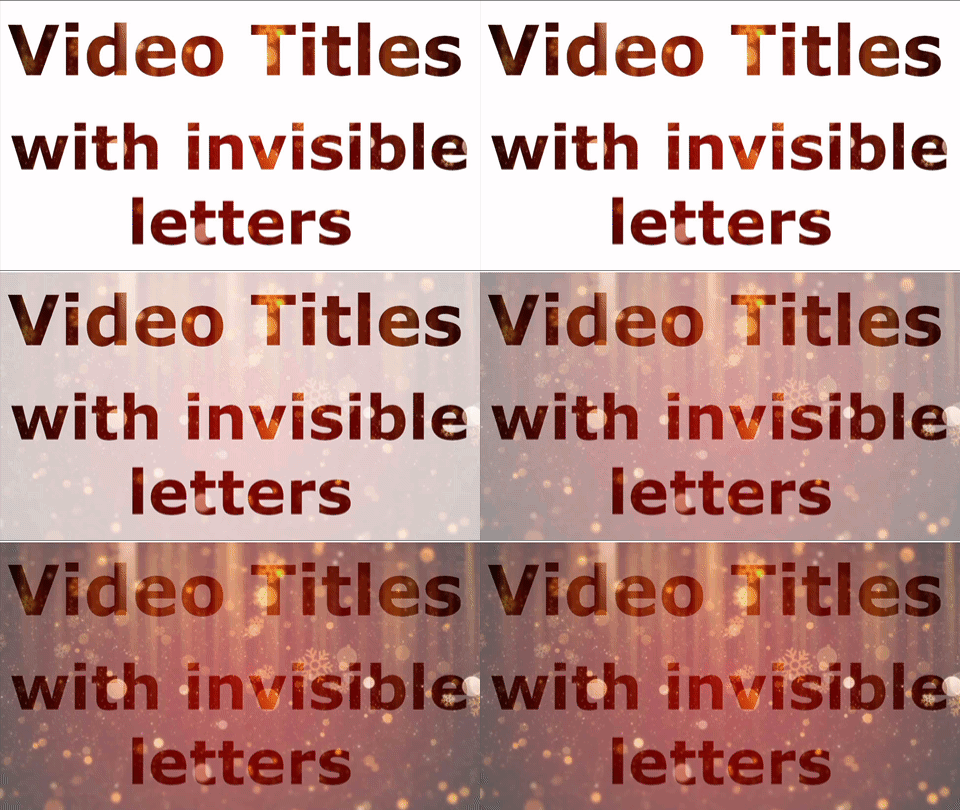 To get people’s attention, your video title should be eye catching. In this article, among other things, you will learn how to make a video title with invisible letters.
First of all, this web page will show you how to create a video title that shows an image through invisible  letters. Then it will show how to find a video of which the theme is the same as the title of your web page. The viewer will get their first view of the video through the letters in the title.
You will need a Mac computer to follow the instructions below.
Overview
Below is a video that will give you an overview of this entire lesson. Watch it once to give you an idea of what the rest of the lesson is about. Then read through the lesson.
Creating invisible letters in 11 steps
To learn how to make invisible letters, you can use either Photoshop or a free program called GIMP. The instructions below use GIMP. As you are following these instructions, you may have to open the above video & pause often. Start now:
- Open up GIMP. Click on File > New > OK.
-
Click on Image > Scale Image and change the width or height so that the image will have some empty space on either side. Then click Scale.
-
Click on Text Tool and then Font Style tool. Scroll down to a boldness that is to your liking and click on it.
-
Click on the size Tool to make the text size you want. Note that you may want to do that twice if 2 different sizes of text in your title makes more sense.
-
Right-click in the right-hand panel and click on New Layer > Transparency >OK.
-
Right-click > Merge Down to hide transparent layer beneath the upper layer. This means that wherever you erase in your upper layer, it will be possible to
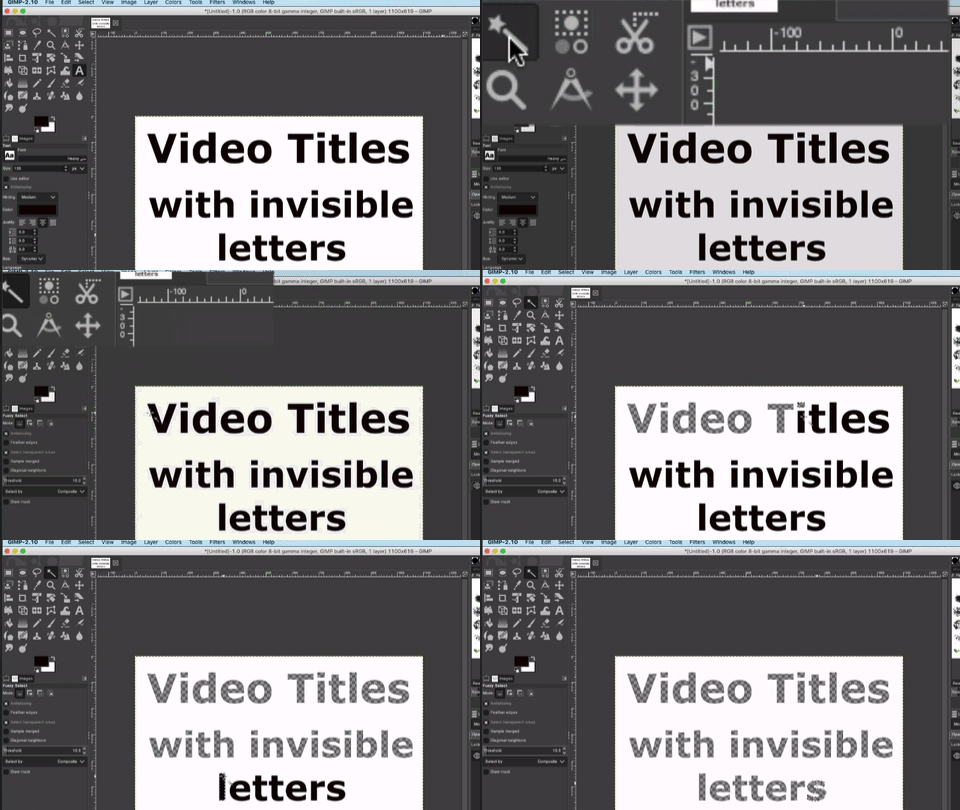 see through that space.
 -
Select Fuzzy Select Tool. Then click on a letter and press the Delete Key. Do this with each letter.
-
Click File > Export As and give your image a descriptive name. Then click on Export > Export.
-
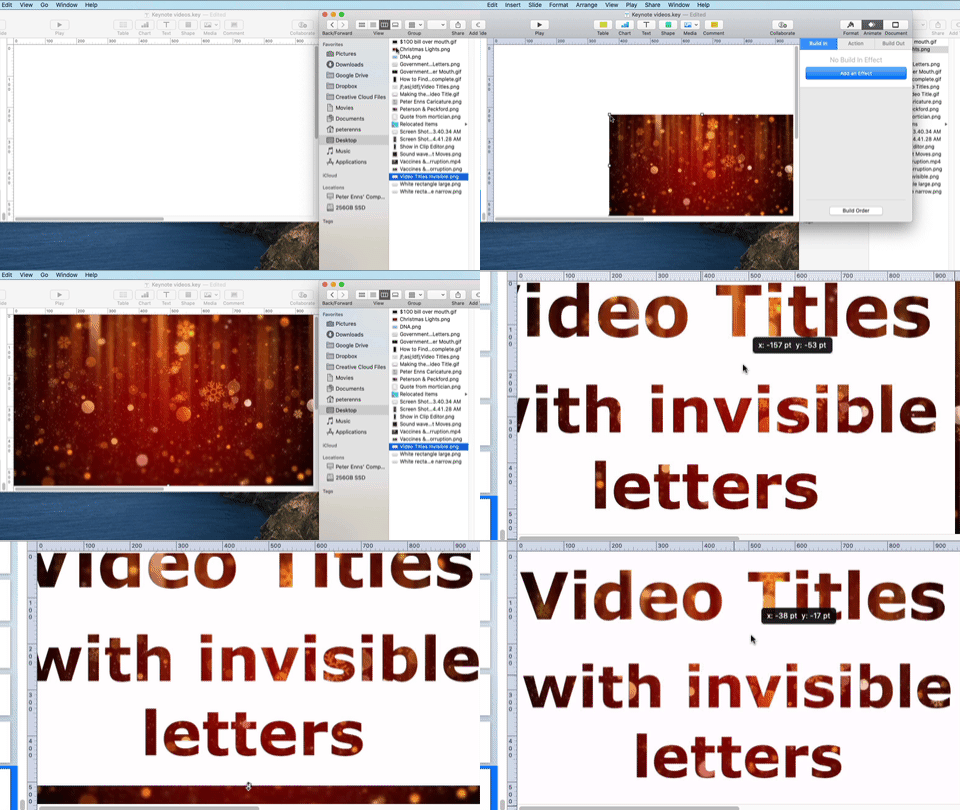 Now you will learn about Keynote. Drag a background picture from Finder onto a fresh Keynote slide. Size it so that it fits the entire screen.
 -
Drag your image with the invisible letters onto the slide so that you can see the image through the letters. Size the letter image so that it covers the other image properly.
-
Select your letter image and then click on Animate > Action > Add an Effect > Opacity. Change the opacity to, say, 40% and the time to, say, 4 seconds. Click Play and move your cursor to the right of the screen. (If you don’t move the cursor, it may show up in your video.)
Video title & background image
We are now going to create a video title with a video showing up in the letters. The web page containing this video can be found here. Notice that the background video within the video title clip is closely related to the title message.
You have to subscribe to a video/image/music subscription service to be able to find related material. I got my subscription service through ScreenFlow. That’s the program I use to make all of my videos.
(If you presently use ScreenFlow, you can get help finding their subscription service by emailing desktopsupport@telestream.net.)
Using a video to match the theme of the title
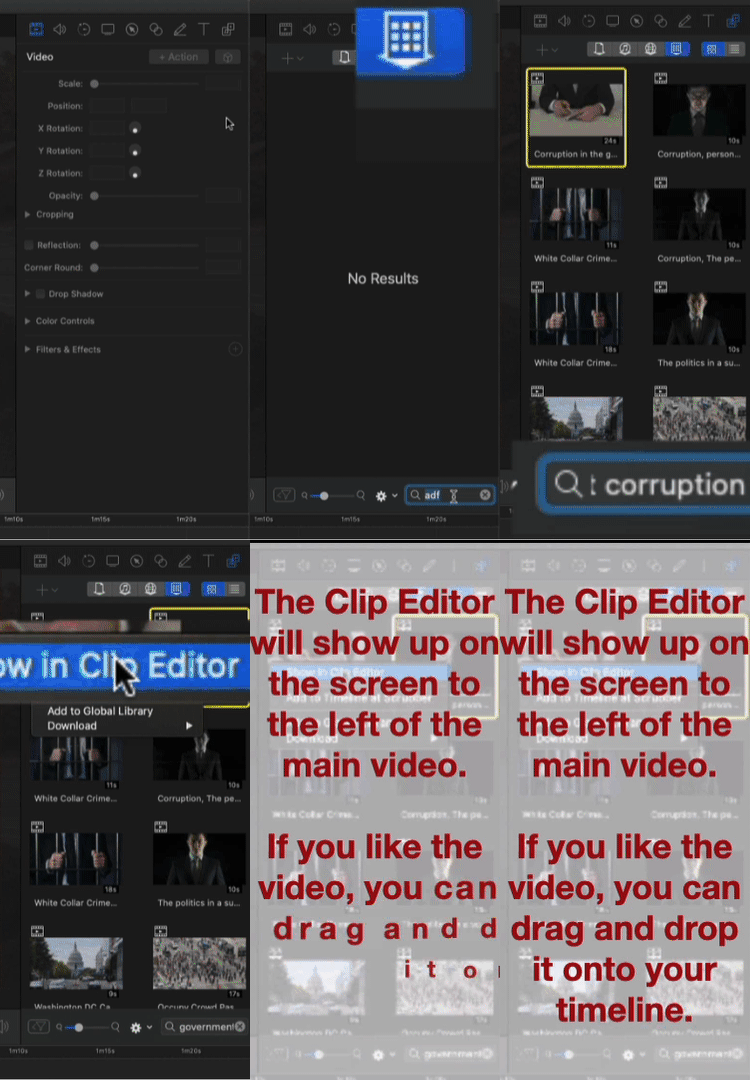
After you have purchased ScreenFlow along with the subscription to video/image/music service, you can find an appropriate video using the steps below. Follow along with the animated GIF on the right.
- Click on the 2 overlapping squares in the extreme upper right corner of your ScreenFlow page.
- Click on the down arrow with the 9 tiny squares inside.
- Go to the box at the bottom of the panel. In the animated GIF the words “government corruption” are typed into the box.
- Right-click on any thumbnails that may be appropriate.
- Click on Show in Clip Editor.
- If you like a video you want, you have 2 choices:
- Drag the thumbnail of the video onto your timeline or
- Record the video with ScreenFlow and then turn it into an animated GIF.
Further down this page we will show you how to use that animated GIF.
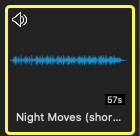 Note that some of the thumbnails will be audio clips such as the one you see on the right. To hear it in action, go to this video about government corruption. You may be wondering how the music volume lowered every time any words were spoken. This was accomplished using a feature called audio ducking.
Creating the title clip for the Government Corruption video above
-
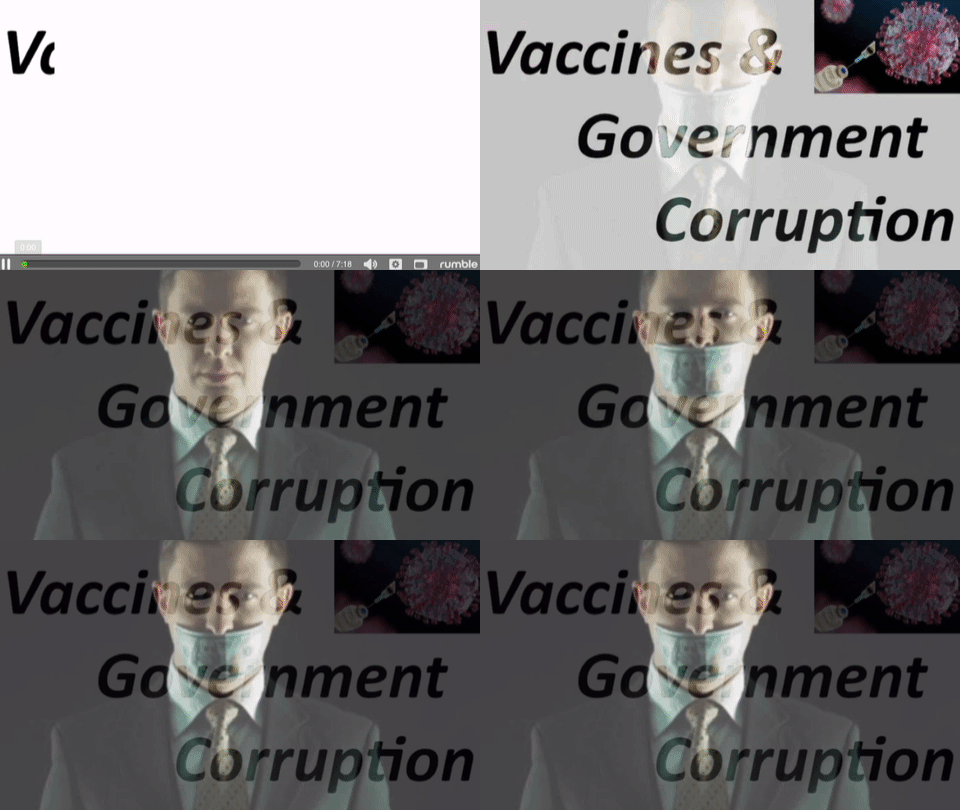 Start by keying in your video title using invisible letters on a white GIMP rectangle.
-
Create 2 white rectangles for the beginning of the title. File > New and change the height of the new rectangle to, say, 200. That creates the narrow rectangle.
-
Click OK and then File > Export As. Give it a descriptive name and click Export > Export.
- Use the same process for the the wide rectangle. You obviously use a larger height.
-
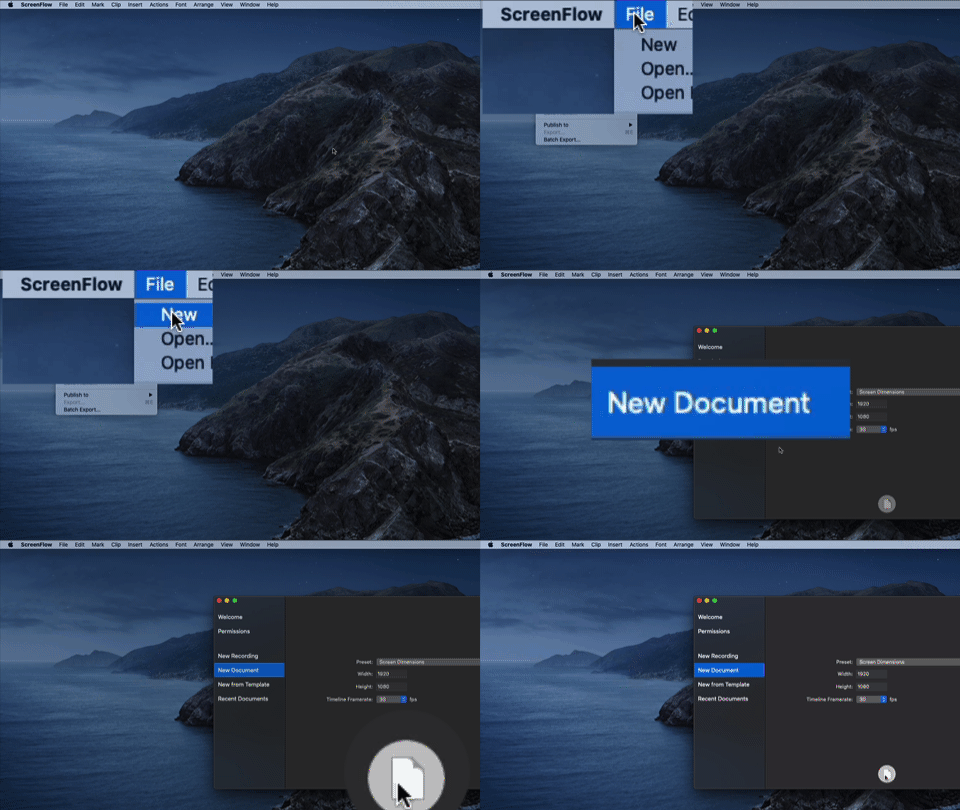 Select the ScreenFlow program and click File > New. Select New Document and click on the symbol in the lower middle of the panel.
 -
Select the Media Library symbol in the upper right-hand corner and then the down arrow with the 9 tiny squares.
-
In the search bar towards the bottom, key in a short description of the video you are searching for. Drag what appears to be an appropriate video onto the timeline. Give your new video a descriptive name and save it.
-
Click File > Export > Manual > Animated GIF. Change the size to 25% of original and click Export. The animated GIF will be saved onto your desktop.
-
Drag and drop that animated GIF into a new Keynote slide. Size it to fill the entire slide. Then drag and drop the title with the invisible letters on top of the animated GIF. Size it to fit the entire slide.
-
Now drag and drop you 2 white rectangles to cover the text in the title panel.
-
 Select the top white rectangle and click on Animate > Add an Effect > Move. Click Play to make sure it moves properly.
 -
Do the same with the second white rectangle. Drag the tiny red square on the end of the red line to adjust the it.
-
Click the Build Order button. Here we noticed that the Invisible Letters panel wasn’t even
there. So, select it and change the opacity to 40% and the time to 4 seconds.
-
Click the Build Order button again and drag the Start Movie item to the fourth position.
-
Click play to check out your work. In the animated GIF above, the narrow white rectangle had not been drug out to the right far enough. So, drag it out and play your video again.

