
6. Record your voice
-
 People are more likely to understand your message when there is text and voice as opposed to just voice
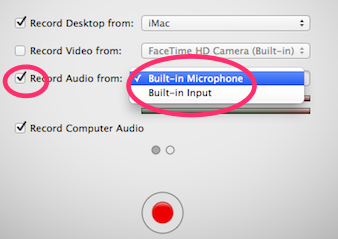
- Click on Configure Recording
- Click on check box that corresponds to the microphone box.
- Choose your choice of the two microphones
- Open up your Keynote slide show
- Highlight first slide
 Click on ScreenFlow movie icon and click Record
- As soon as countdown is finished, click on Keynote Play button
- Read all of the text into your Mac’s built-in microphone
- After finished reading all text, press Esc key
- Click on camera icon
- Stop Record
- Your new video will open up
- Click on File > Rename
- Immediately give it a descriptive name in case it accidentally gets deleted or partially erased
- Now begin to edit audio
7. Isolate each set of audio waves
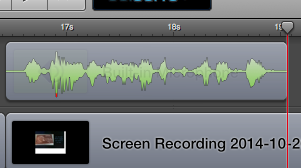
 Timeline at the bottom will be composed of two tracks — an audio track and a video track.
- Select and delete video track
• Audio track is only thing we are
interested in right now.
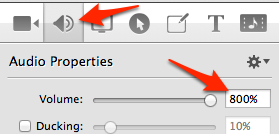
• You will notice that sound waves in left-hand image are rather small.
• Click on audio properties icon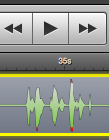 and give the volume a large number such as 800
• Press Tab key
• Waves will get much larger- Much easier to edit audio
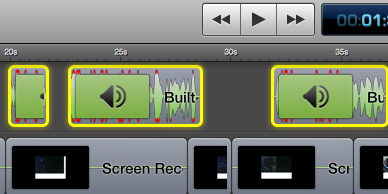
- Isolate waves and ignore flat (silent) lines
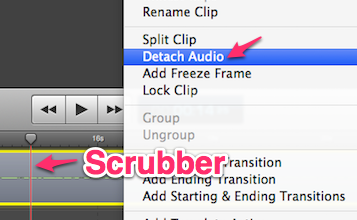
- Move scrubber to front of a wave
- Right-click on the clip and click on Split Clip
- Isolate each set of voice waves, press Cmd C to copy into clipboard
- Then Cmd V to paste them beginning in the appropriate place on time line of original video
- Appropriate place would be after first word of the video clip
- In the image below, it would be just beyond the word “we”.
8. Freeze frames to position sound waves correctly
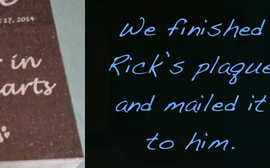
- At times audio wave goes beyond end of text
- For instance, these waves say “We finished Rick’s plaque and mailed it to him”
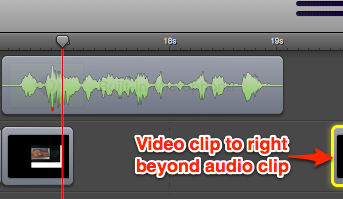
- Voice goes to right beyond text in video clip
- Viewer of finished video will not have time to read it all
- So, it is necessary to extend video clip to at least as far as end of audio clip
-
- Move scrubber to end of text in video clip
- Right-click and click on Split Clip
- Move right-hand video segment to right of the audio clip
- Move scrubber so that it is no longer at very end of video clip
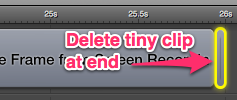
- Click on Add Freeze Frame
- Right-click on video clip
- Delete tiny clip at end of new freeze frame
- Then hover over right-hand edge until you see two-pointed arrow with a line through it
- Drag that either to right or left to beyond the end of audio clip
- Make sure video clip you dragged over to right is touching video clip on left
- Otherwise black frames will show up
- Drag scrubber to beginning of audio clip and check work
- Go through same procedure for every audio clip
- Make sure there are no gaps between any of the video clips
- Save your video and watch it several times until you are satisfied with your
creation
Many other features of ScreenFlow
Go to the YouTube music blog post where you can choose from 50,000 free music clips for your YouTube video. You can categorize them by genre and mood.
Watch the YouTube videos below to learn much more about what ScreenFlow can do for you.
Think about these two videos as you are watching them. How many special features do you think you can see?
In order to learn how to make professional-looking YouTube videos, you must practice making them over and over and over.
Scrubber: The vertical red line in the editing window that determines exactly at which point you are in the video.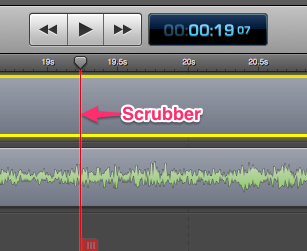
Commissions
 Every time someone buys ScreenFlow, I get a small commission. Please support me and purchase ScreenFlow to help cover the cost of producing this tutorial.
