
Visual Composer for online flyer
 To create an online flyer you should use a WordPress plugin called Visual Composer. As you are practicing making the online flyer, you should go back and forth between this tab and the Visual Composer tab.
The Digital Flyers blog post says: Home renovation chain Rona replaced its printed flyers with expanded digital flyers. As a result, their sales doubled at its stores across Canada. So, it may be worth your while to learn how to create an online flyer using Visual Composer.
Materials required
 A WordPress website promoting your business
- Visual Composer plugin
- GIMP
Single product
 Your online sales flyer should have one product per row. This post tells you how to create the promotion for a single product.
 You start your online flyer by getting some eye-catching artwork that tells a story. With the image to the right, there is no question that it is about Facebook.
![]() Then use GIMP eyedropper icon to select the precise colour of the word “like”. Click on the icon and then click on the word “like”. The colour you see in the bottom has the hexadecimal code of #605FD9. That is the main colour you will use for borders & text.
Then use GIMP eyedropper icon to select the precise colour of the word “like”. Click on the icon and then click on the word “like”. The colour you see in the bottom has the hexadecimal code of #605FD9. That is the main colour you will use for borders & text.
Flyer item on scrap paper
Make a rough sketch of your online flyer and then one ad on scrap paper. Include the wording for the text panel.
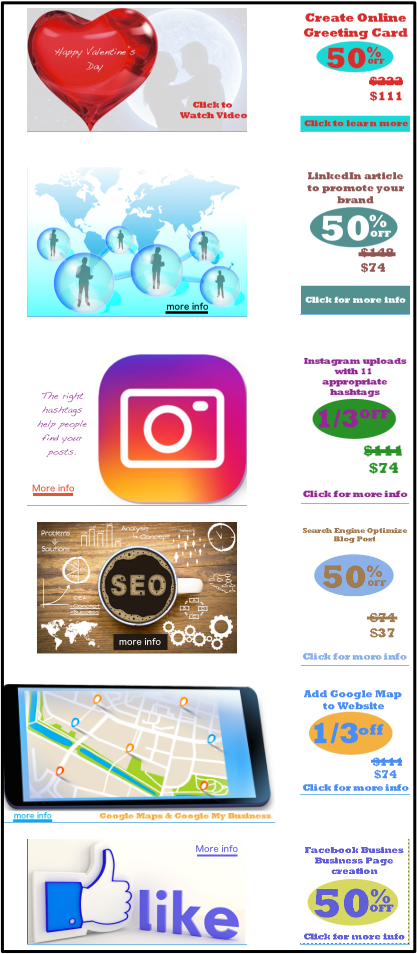
In this example, we will be selling the creation of a Facebook Business Page at 50% off. For continuity, there will be a similar style to the other ads in the flyer.
I prefer fewer than six words in the heading. I chose “Facebook Business Page Creation”. Below that there will be 50% off in a coloured oval. The regular price will have a line through it. Below that will be the sale price. Below that it will tell people to click for more info.
Create your text panel
 Your entire product promotion panel will be 660 pixels wide. So, using Image > Scale Image, change
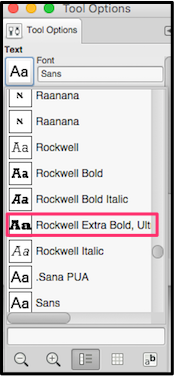 the image panel to be two thirds of that amount. (It will be 440 x 214 pixels.) Create a new panel that is the same height but half the width. (It will be 220 x 214 px.)
Using the Rockwell Extra Bold font, give it a title like you see in the example.
Complementary colour
 You need to find the correct colour for the oval. This will be a colour that complements the text.
To find that, go back to the hexadecimal page.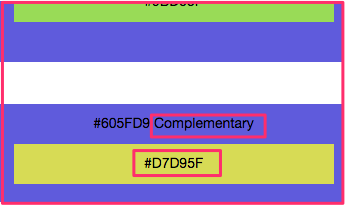 In the Enter Hex Colour Code box, enter 605FD9. That is the colour of the text. Scroll down and you will find the complementary colour. It happens to be #D7D95F.
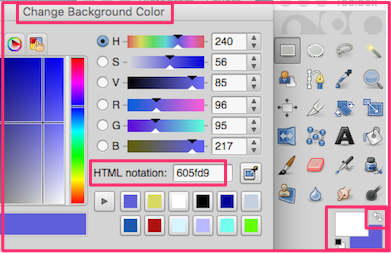
In the GIMP toobox, click the double-headed arrow next to the white & purple to move the purple (#605FD9) to the background colour. Click on the purple box and the Change Background Color panel shows up.
Enter D7D95F into the HTML Notation box. Click OK and the background colour now is yellow (D7D95F). Create a new box that is the same size that you want you text box to be. It will be yellow.
Make sure your foreground colour is purple (605FD9). Click on the Text Tool, change the font to Rockwell Extra Bold. Set the size to 100 px.
Creating oval with text
Making sure your background colour is set at yellow, create a new box the same size as the text panel (220 x 214 px.). Setting your foreground colour at purple, the font face to Rockwell Extra Bold and your text size at 100, type the number 50 onto the yellow panel. Right-click > Merge Down. Setting the text size at 50, make a percentage sign (%) beside the 50. Setting the text size at 25, make the word “off” below the %.
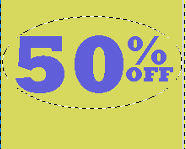
 Using the Ellipse Select tool, draw an oval around the text. Click within the oval and then press Cmd C. The oval without the rest of the rectangle will exist within your clipboard. Press Cmd V to paste the oval below the headline.
If the oval is too large, click Cmd Z to delete it. Then click on the yellow rectangle and re-size with Image > Scale Image. Paste the new oval back into the white panel again.
Add prices & CTA
Add $37 below $74 and add a line through the regular price as you see in the image below. You can use the Pencil tool to draw the straight line through the regular price.
Add your “click for more info” text.
Completing the ad with borders
The size of the ad will be 660 x 214 px. So, you create a purple rectangle that size and reduce the height of the 2 panels by 4 pixels each. Copy & paste them onto the purple rectangle. That will have you an ad with nice even borders.
These are the steps you take.
- Make sure purple is the GIMP background colour.
- Make a new 660 x 214 purple rectangle.
- Using Image > Scale Image, make sure that both the Facebook image and the text box are 210 pixels high.
- Use Cmd C & Cmd V to copy & paste the two smaller panels onto the purple rectangle.
- If you have copied & pasted the 2 panels around properly, you will have a completed ad with borders around them.
GIMP
GIMP is a free open source program. Programmers from all over the world collaborated to make a program similar to Photoshop.
Start with a very quick GIMP lesson.
