How to Add an Animated GIF to Facebook

Animated GIF & then text

FacebookThis post discusses how you can insert two different types of animated GIFs into Facebook. In a nutshell, to add your animated GIF, you first of all paste the URL of the GIF into Facebook. Then you add a few spaces and type in your text.

We first discuss free animated GIFs and then animated GIFs that you create.

Free animated GIFs 

  1. Go to a website such as giphy.com and select an animated GIF you like.
  2. Select URL in address bar.
  3. Cmd C to copy into clipboard.

Animated GIFs you created

  1. Add Media button, & Upload Files button
  2. Drag GIF from Finder
  3. Click Insert Into Post
  4. Select text near GIF
  5. FacebookLook at page in Text mode
  6. There will be a URL near text you selected
  7. Select URL & Cmd C to copy into clipboard.
  8. Click Update button to save all your work.

Click here to learn more.

Create Facebook post

  1. Open FacebookFacebook
  2. Cmd V to paste URL
  3. Add a few spaces
  4. Type text
  5. Click Post button.

You’re finished

Watch the YouTube video below to help you understand every point above.


How to Create a Short Video with a Powerful Message

Your problem

short videoHere’s your problem: The shorter the YouTube video, the more people will watch it. So, how do you make a short video that includes all of your very important message?

The solution

Start by having a web page that presents your message quite succinctly. Then, using different words, write the succinct message in a way that can be presented in your short video.

Wherever possible, express your idea with an image instead of a words. Integrate your succinct message into your video.

At the end of the video, write out the URL of the web page. Show it statically for about 20 seconds so that your video doesn’t quickly change to your competition’s video.

Click here to learn more.

An Example

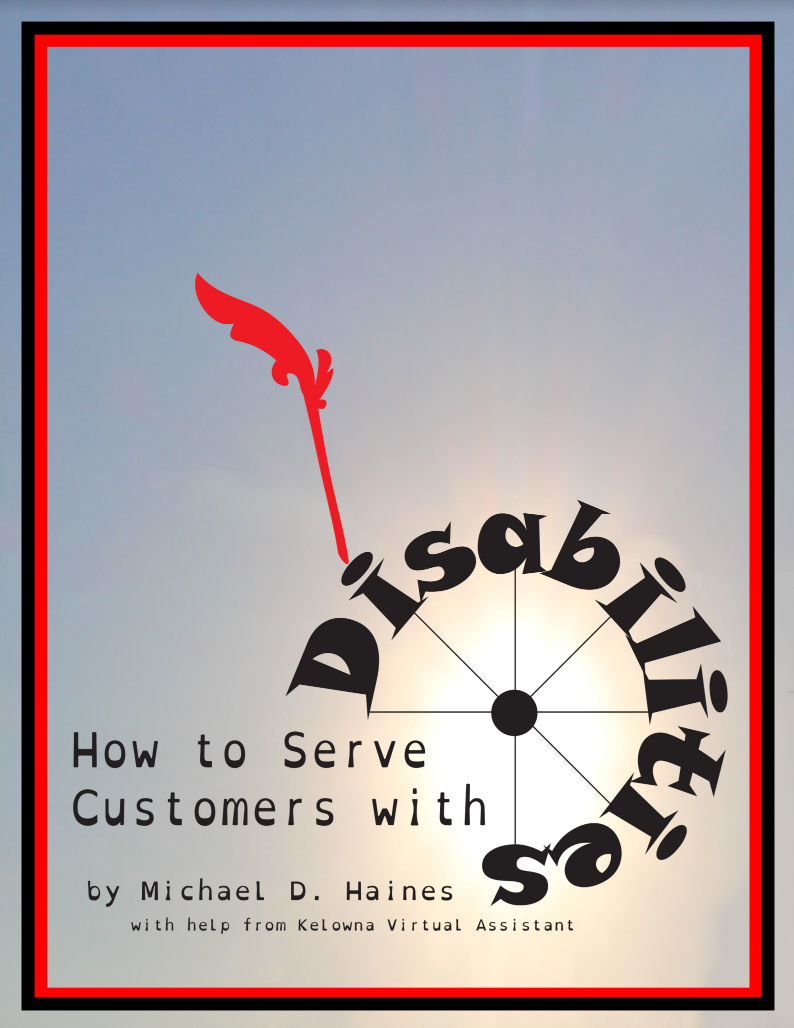
short videoI was promoting an ebook called How to Serve Customers with Disabilities. It is an ebook that is available on Amazon.

I had previously written the succinct description of the ebook below.

You may be trying to serve customers with

  • Down syndrome,
  • A wheelchair,
  • Vision problems,
  • Hearing problems,
  • Dexterity issues,
  • Memory problems
  • Or any of a wide variety of disability issues.

How to Serve Customers with Disabilities will help you make these customers feel more included. Often people with disabilities can feel marginalized. What you will learn in this training manual can help you make these people feel like returning to your business.

As you can see in the video at the bottom of this page, the description above is included in the short video along some appropriate images. Note that the URL of the web page remains for around 20 seconds.

After I was finished the video, I posted it on this Facebook page along with a few words of explanation.

Free online course for making a short video

short videoGo to 7 Day YouTube for guidance on how to make your short video.

(The repeating video here is called an animated GIF. Learn how to make them.)


Watch my short video

How to Quickly Upload Videos from Android to Secure Google Drive

Clear out videos to add memory

Google Drive

Suppose you are on vacation and have filmed a number of short videos with your Android smartphone. You are afraid that you may soon run out of memory. So, what do you do? Before you left home, I hope you created a Videos folder in Google Drive. Find your Android’s Google Drive icon.

You will upload your videos to Google Drive and then delete all of your videos from your smartphone. Then you can continue on your vacation confident that you have room on your smartphone for lots more videos.

Don’t see Google Drive icon?

Google DriveWhat if you can’t find a Google Drive icon?

    • Most likely be in a Google folder on Android screen
    • Hold your finger on Google folder icon.
    • It will open displaying a number of icons for different Google apps.
    • Hold finger on Google Drive icon
    • Drag it out of folder.
    • Tap Back icon to close folder.


Upload to Google Drive

  • Tap the Google Drive icon.
  • Find and tap Videos folder.
  • Then tap blue circle with white plus sign.
  • Tap Upload
  • Tap each video (MP4 file) you wish to upload.
    • (For reasons unknown to me, sometimes you have to tap Open at this point and sometimes you do not.)
  • You will see a moving blue progress bar.
    • As soon as it quits moving, your MP4 file will have been uploaded.

After you get home…

After you get home, go to Google Drive > Videos on your desktop and double-click on your various videos you see in Finder. That will automatically  open your  videos using QuickTime Player. If you do not have that program, download a free version of QuickTime Player from the Softonic website.

Edit with ScreenFlow

Google DriveIf you want to edit your videos, you can do that with ScreenFlow. You can add video clips together, add titles and add many other amazing features with ScreenFlow. Click on the blue Free Trial button on the image to the right.


Rotate video 90 degrees

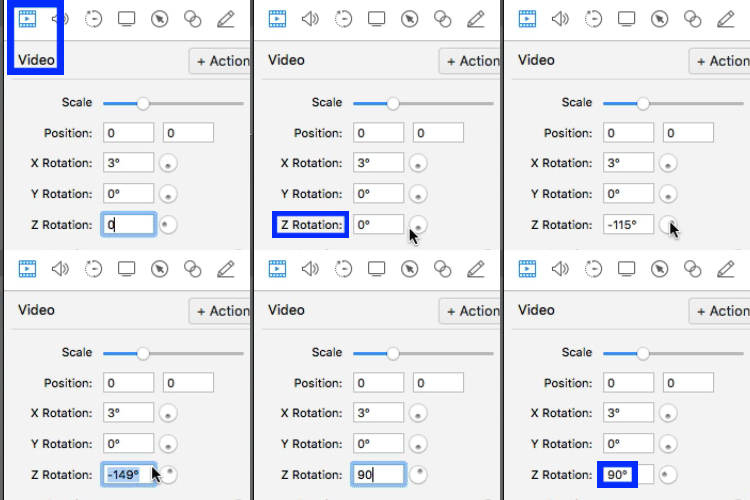
Google DriveAfter you get home, you open the MP4 files in Google Drive. And some of your videos are sideways. If you have ScreenFlow, there is a simple way to rotate those clips.

Go to your ScreenFlow timeline and select a clip that needs rotating. In the panel to the right:

  • Click video icon
  • Go down to Z rotation
  • Change number to 90 degrees as you see on the animated GIF here.
  • Press Tab key to save the number 90.


How to Find a Creator of Amazing Animated GIFs

Some of my recent animated GIFs

As a VA (virtual assistant), I can research and write blog posts for you. I can also create YouTube videos & animated GIFs like the ones below.

Increase sales disabilities.gif


Creating a Pinterest pin.gif

GIFs

Aging Reversed 3 Pictures.gif

GIFs

Many social media.gif

GIFs


VA animated.gif

GIFs

Real men.gif

GIFs


Describes your day.gif


Keynote text effect Squish Flame.gif


YouTube black text to colour


7 Day logo Bitly.gif

GIFs


Learn YouTube housewife.gif

GIFs

Animated GIFs and marketing

Hybrids & CTA

The animations above are like hybrids between still pictures & videos. So, if used properly, they can tell a story more powerfully than still pictures.

Like still pictures, they can easily have a CTA (call to action). For example, if you click on the GIF above, you will be directed to a place where you can get a free YouTube video creation course.

Don’t be intrusive

A properly constructed animated GIF will guide the viewer to have the right marketing action or attitude without being intrusive.

Different viewers can tolerate different amounts of movement without being distracted. So, have enough movement to attract their attention without preventing them from reading your article.

Emotional impact

People buy for emotional reasons. Create your animated GIFs to create the right emotion.

This masterpiece from Cinemagraphs will connect with the audience emotionally.

I cannot say enough good things about Cinemagraphs. They are a creative studio specializing in the production of cinemagraphs, from concept to creation.

If you want super high-quality animated GIFs, ask Cinemagraphs to make them for you. Even if you do not want an animated GIF, go to their website now. Just consider it art appreciation.


Social Media Manager’s Suggestions


Create an Animated GIF

click-here-start-online-business

The left-hand portion of this image was at the top of one of my blog posts.  Even though it said, “click here”, only one person clicked on it.  By combining that image into an animated GIF, I am hoping to increase my click-through rate.The above animation is telling people to click in a much more powerful way than the still picture ever could.  If you are into online marketing at all, it is important to learn how to make animated GIFs.

The purpose of the above animation is to create more calls to action (CTAs).  A good animated GIF can increase the CTAs without being too distracting.

Explain things in seconds

Watch the animated GIFs on this page. See how very complicated concepts can be explained in just seconds using an animated GIF.

Create your animated GIF in 6 steps

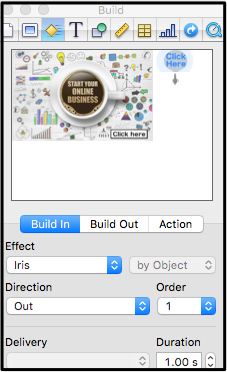
1. Choose the pictures you will usebuilt-in-effect

2. Set up your story on Keynote


3. Choose the effects you want


Earn a percentage of the selling price for every book sold.

Click here to learn more.

4. Using ScreenFlow 6.x or better, record your Keynote slide presentation

5. Edit ScreenFlow video to maximum size of 500 x 500 px. & shortest time reasonable.

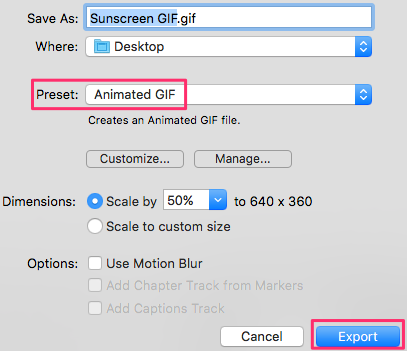
screenflow-export-menu6. File > export. Set preset as animated GIF.  Click
on export button.


Peter Enns has been developing websites since 1996. He is a social media blogger and author of the free YouTube video-creation tutorial called 7 Day YouTube.

tweets

11 Tips to Enhance Your YouTube Video Quality


Video Quality start-your-own-business-click-hereI wanted to make a YouTube video to complement my blog post about how to start your online business.   The purpose of the video was to get people to the post. I had 5 main points I was trying to get across.
Watch the video below.

11 secrets  for adding video quality & making some boring points memorable

The 5 points are in abbreviated form such as “paid advertising” and “build a list”. If I would have simply listed those 5 points, most people would have closed the video before they watched it all. I had to enhance the video quality.  So, here’s what I did to make it interesting.


1. Bought the “start your online business” graphic from Adobe Stock.
2. Used the Keynote effects to give movement to the text.
3. Had additional smaller text to give more meaning to each of the 5 main points.
4. Video Quality start-online-businessHad a Keynote “spin” action on graphics that came from the blog post.
5. At the end I added the URL of the blog post that corresponded to the video.
6. I set the Keynote slides to “play” and recorded them with ScreenFlow.
7. Edited the video using ScreenFlow.
8. Using ScreenFlow, I recorded the text as an audio file.
9. Added the individual audio clips to the video.
10. Went to the YouTube audio library to find free music to use in the video.
11. Used the audio ducking feature to soften the music during the speaking parts.


Earn a percentage of the selling price for every book sold.

Click here to learn more.

Buy ScreenFlow

Go to the ScreenFlow website to buy. Alternately, you can get a free trial copy so that you can try before you buy.


Peter Enns has been developing websites since 1996. He is a social media blogger and author of the free YouTube video-creation tutorial called 7 Day YouTube.

tweets

Presentation Software by Keynote

Animator for videos

passive-income-affiliate-mktg-yellow-arrows

Keynote is the Apple presentation software corresponding to PowerPoint.  (All Apple software is free for Mac users.) It can be your animation creator:

♦ Animate your text.  In this example,presentation software Bouncy textit comes bouncing in beneath your picture.
♦ presentation software Photo spin outAnimate a still photo.  In this example, the photo spins out of the video.

How to use Keynote in 9 steps

The example below describes the production of an  introduction for a credit card fraud video.  The Facebook ad in the fraud says that people can get a free trial bottle of Garcinia cambogia.

All they have to do is pay for shipping and handling.  IF they look at their credit card statement a few weeks later, they will see that they were charged full price for the supplement.  Not only that, but they will be on monthly auto-ship.

1. Open Keynote

2. Select theme

I selected the white theme.

3. Clear off slide

Select everything in slide and press Delete key.

4. Add rulers
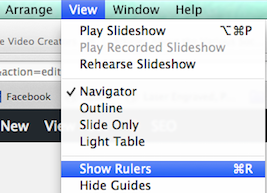
Show rulers


5. Change x/y axis to 44 & -22
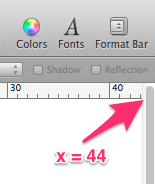
x = 44In order to have the proper aspect ratio for your videos, change the x/y axes to 44 & -22.


6. Drag an image from Finder to first slide
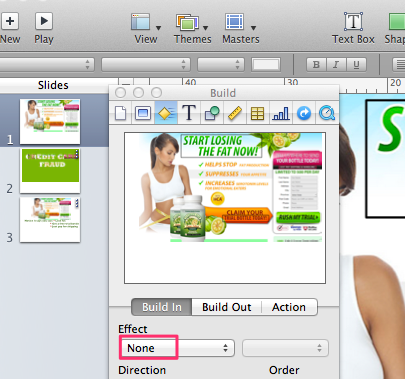
Slide 1, effect noneAfter dragging image to the first slide, click the blue Inspector icon and make sure the build-in effect is none.


7. Drag image to text over picture

Green credit card fraudI selected the picture in slide 1 and then pressed Cmd C to copy it into my Confetti effectclipboard.
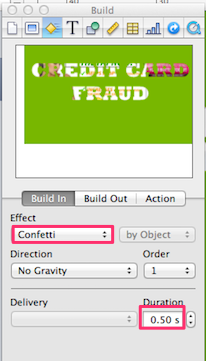
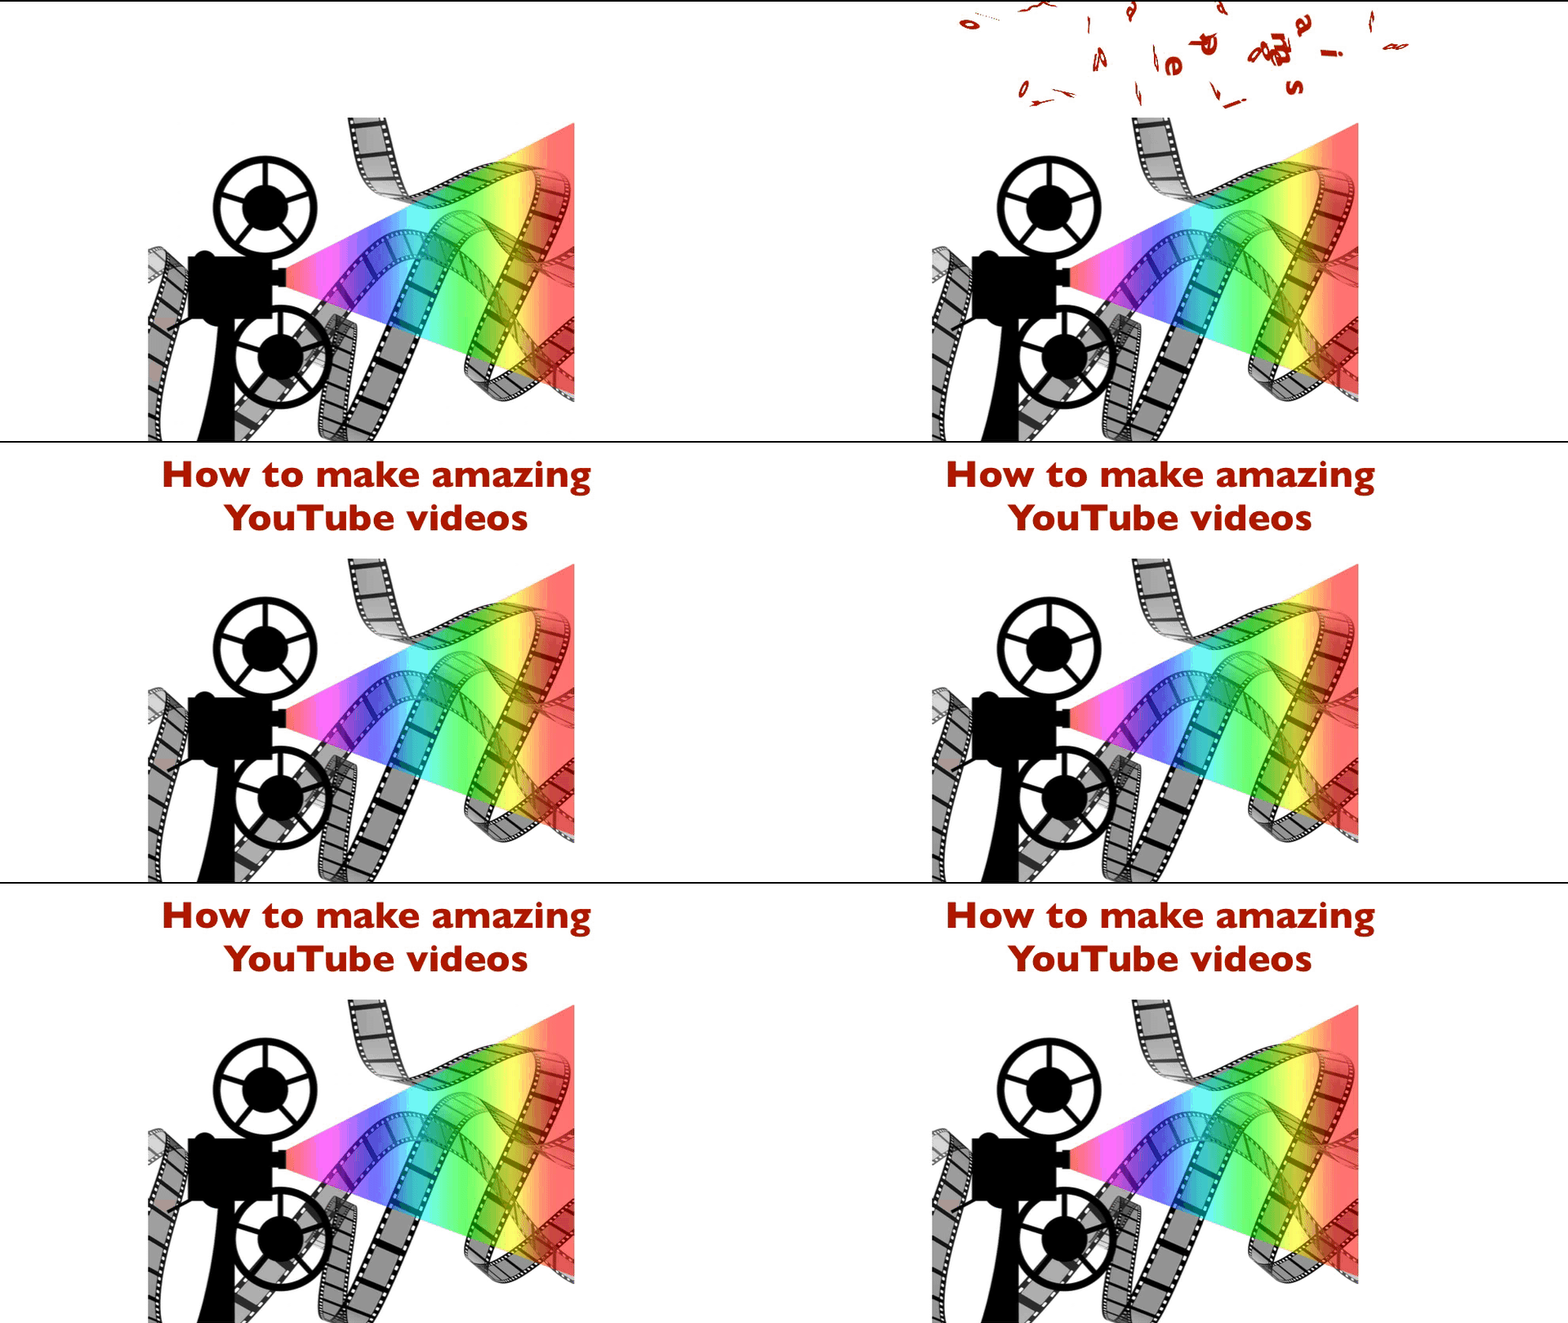
I pressed Cmd V to paste it into slide 2.  Then I dragged the image to text picture on top of the original picture.  Within the inspector I used the Confetti effect for 0.5 seconds.

8. Add moving text

Text box 2At the end of the video you saw how it says freewebdesign.club/.  To create that text, I

  • Clicked on the Text icon,
  • Color iconChanged it to bold,
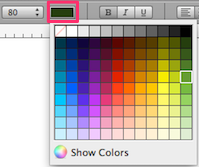
  • Selected individual words,
  • Clicked on the color icon and
  • Selected a color from the menu that showed up.

In this example it has the fly-in effect going from right to left for a duration of 5 seconds.

9. Hit Play button

Set ScreenFlow to record and click the Keynote Play button

Practice

Using Keynote is an important part of YouTube video production.  Spend lots of time selecting an image in a slide and then trying different Effects for different times.  One at a time, select different images on a single slide and then play around with the order drop-down box.  Experiment with different Actions.

ScreenFlow features added

Click to Buy ScreenFlow NowNote that besides using Keynote, some ScreenFlow features were added to the video:


Video Making, How to Create an Effective Video

Excavator page under construction


___ steps to making the credit card fraud video

Watch the credit card fraud video and then study the steps to create it.  The points learned could be transferrable to the next YouTube video you create.

1. Use Google Trends to help create title 

Google Trends can give you statistics on what long-tail keywords will help the search engines find your video.

Use a title that will grab a person’s attention.  Make it short (less than 6 words).

I prefer that the most important long-tail keywords have between 10,000 & 100,000 monthly Google searches.  Garcinia cambogia has 823,000 searches.  Garcinia cambogia pills has 33,100 searches.  Credit card fraud has 12,100 monthly searches.

I did not do a very good job of search engine optimizing the title of the video.  I used credit card fraud in the YouTube description of the video.  At the end of the video, it suggests that people go to a web page named Garcinia cambogia pills.

You can see a video of the title on this blog post.

2. Show image of offending ad for several seconds

This will quickly set the stage for the next image.  I used it for 5 seconds.

3. Display image in title

Green credit card fraudUse image to text to display the image from step 2 within the letters.  Search for significant parts of the image to display within the words.

Earn a percentage of the selling price for every book sold.

Click here to learn more.

4. Use another eye-catching image

Pay a small amount of money to find unusual eye-catching images.  You are competing with a huge number of web pages for attention.  To make your images stand out, they must be different and they must make people stop and look.

Fat woman in pink ladyThe photo of the obese woman grabs people’s attention.  It is a good place to display moving text using Keynote.

Visuals are processed by the brain 60,000 times faster than text.  So, before displaying the moving text, it is better marketing to have a visual show up.

This image shows up in the YouTube video below.


5.


Peter Enns has been developing websites since 1996. He is a social media blogger and author of the free YouTube video-creation tutorial called 7 Day YouTube.

tweets

Image to Text, Tell a Story

Change a picture to text

Ski image to text

Suppose you were going to design a pamphlet for a ski resort.  Using the GIMP image to text system, you can display the text as a picture of the ski hill.

Image to text in 21 steps

  1. Open GIMP
  2. Open a new file with a white background.
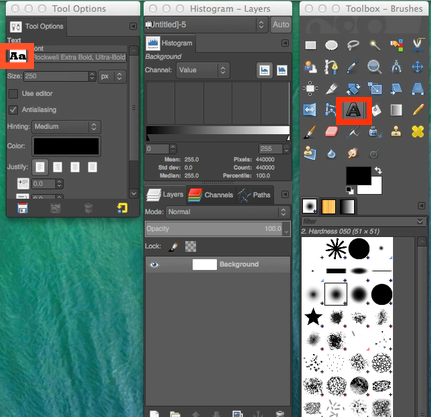
  3. Click on text icon in toolbox.
  4. GIMP fontsLook at fonts in Tool Option panel.  Click on a thick one to select it.
  5. Key in word in black text
  6. Enlarge it but make sure some white space is around it.
  7. Crop it
  8. Right-click in the Layers panel and select New Layer
  9. Make sure you select Transparency and click OK
  10. S K I checkersRight-click again in the Layers panel and click Merge Down. (This allows you to erase.  Where the checkers appear beneath the picture, a transparent area has been created.)
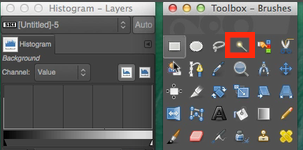
  11. Fuzzy select toolClick the Fuzzy Select Tool.
  12. As you click on each letter and then press the Delete key, the black letter will disappear and become transparent.
  13. Download the background photo.  Make sure the width matches the width of the text.
  14. Click on the text image and press Cmd C to copy it into your clipboard.
  15. Press Cmd V in your background picture and move the text to the ideal position.
  16. Click on the background picture so that your text is anchored.
  17. Select a rectangle around the text.  Make sure you have enough white space.
  18. Click Image > Crop to Selection.
  19. Save your new image with a descriptive name.
  20. Export it as a PNG file into your Pictures folder.
  21. Go to your Pictures folder and double click on the name of your new image.

It is ready for you to use in your promotion.


If you had trouble following those 21 steps, watch the YouTube video again.

Image to text with Photoshop

Here’s how to change image to text to a photo with Photoshop.


Voice Clips and Music in Your Video


Soften music while voice clips play

Colorful musical design

This blog post explains how to add voice clips into a video using ScreenFlow.  Then you will get free music from YouTube.  The music will soften while the other sound clips play.

Creating proper voice clips in 8 steps

The points below are a quick overview. For more precise instructions for editing voice clips, watch the video above.

    1. Type script into a computer file
    2. Make audio recording of that script
    3. Make ScreenFlow recording of many non-audio features of the video
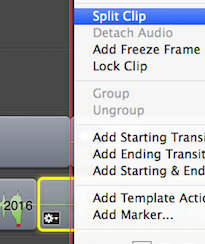
    4. Split voice clips to delete silent partCopy & paste audio recording into non-audio video
    5. Delete silent part between each voice clip.
    6. Align each voice clip below the corresponding video clip
    7. Make sure there is at least one second between voice clips.  You have to give the viewer time to process the information.
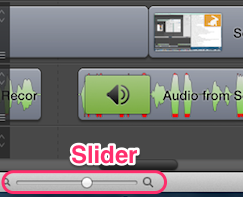
    8. Slider 2Adjust the speed with the Clip Inspector or else use the Slider to make sure video clip corresponds optimally to each sound bite.

Adding music to YouTube video


Earn a percentage of the selling price for every book sold.

Click here to learn more.

Find free music in 7 steps

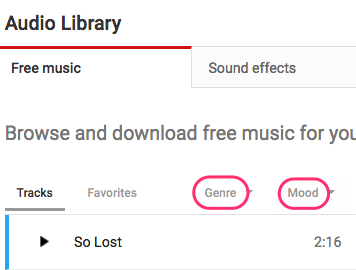
  1. Genre Mood Audio LibraryClick on the help button at the bottom of your YouTube dashboard
  2. Search for free music
  3. Use the get music from audio library option to find the audio library.
  4. Click on Genre and then Mood to find a selection of possible candidates
  5. For instance, if your video is aimed at the general public and happens to have a happy theme, your genre & mood could be pop and happy
  6. Click on the triangle to the left of each selection to hear as much as you want.
  7. Download credit musicWhen you find the selection you want, download it into your download folder using the down arrow.  (If the line has an icon of a man, you must credit the person in your video description.)

Soften the music in 8 steps

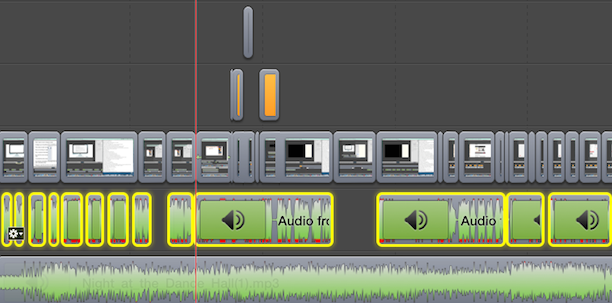
  1. Highlight sound clips that are to remain loudHighlight sounds that are to remain loud
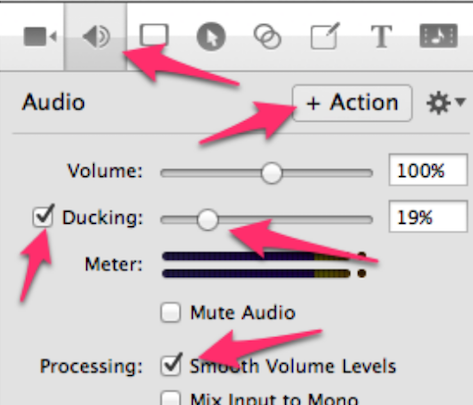
  2. Click on audio properties button
  3. Check ducking box
  4. Move ducking slider to the appropriate number.  (I chose 19).
  5. Audio ActionsClick Action > OK
  6. Highlight music clip
  7. Change volume and click Action > OK.  (I chose 48.)
  8. Watch your video and note how the volume softens whenever there is a voice clip.

Click to Buy ScreenFlow Now

This page promoted in social media

Film Reel Directors ChairThe picture on the right is used to brand this page.  It is used in each of the 7 social media posts below.

The first 3

Click on the link to see how I promoted this blog using Facebook, Twitter & Google+.  In each case it will be the post with the branding picture.  Note that the picture may be grayed out using GIMP to make the text more prominent.

YouTube

This YouTube video is the same one that you can see above.  I use the video as a guide for creating the social media posts below.

Corresponding Pinterest pin

Voice Clips Pinterest

SlideShare


To get started making a SlideShare presentation, I usually use the Keynote slides I used for creating my YouTube video.

The YouTube presentation has a different aspect ratio.  In Keynote I go across to 44 and down to -22.  For a SlideShare presentation, I go across to 50 and down to 40.
To find all of the blog posts about SlideShare, go to the appropriate menu.

LinkedIn


LinkedIn
usually is the past social media post I make.  The post corresponding to this page can be found here.


Don’t have a Mac?

You need a Mac to use ScreenFlow. If you are serious about wanting to create video, make sure your next desktop computer purchase is a Mac.


Peter Enns has been developing websites since 1996. He is a social media blogger and author of the free YouTube video-creation tutorial called 7 Day YouTube.

tweets