Free advertising with a quiz
 When you market with a quiz or personality test, you are using the most shared content on social media. You will be paying for promoting your quiz on Facebook. However, every time someone shares your quiz, that will be FREE advertising.
Two types of quizzes that can get you lots of social shares are
- quizzes that make people laugh and
- quizzes that make people realize how good or smart you are.
Facebook advertising to show how smart you are
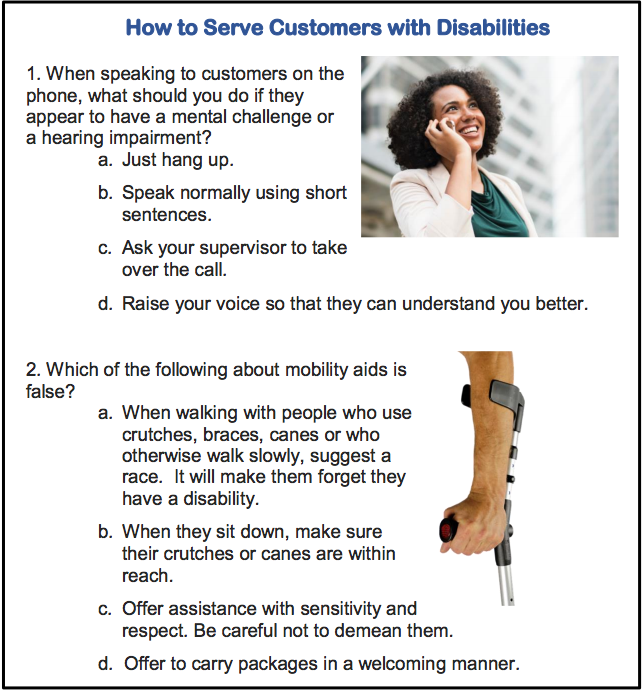
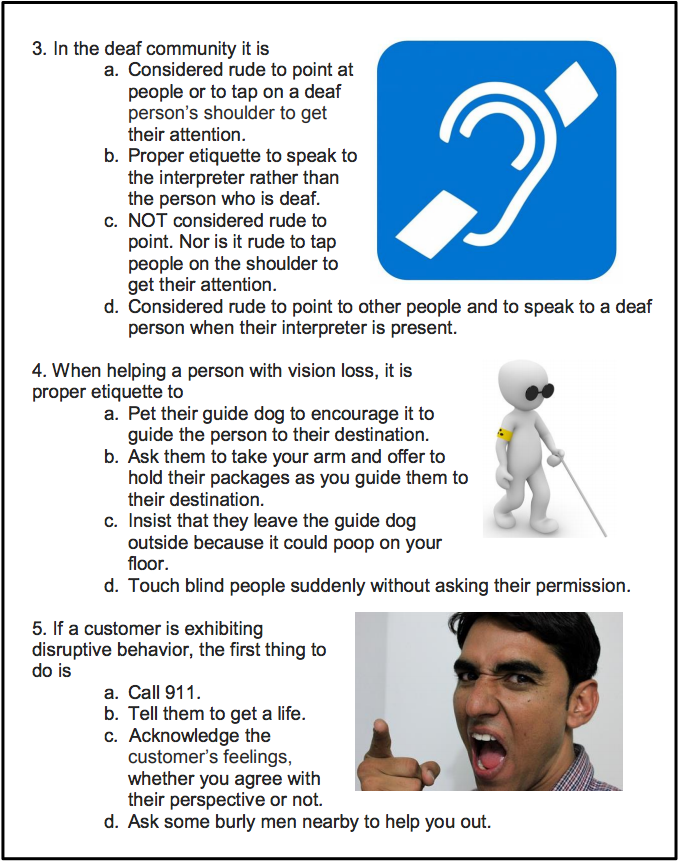
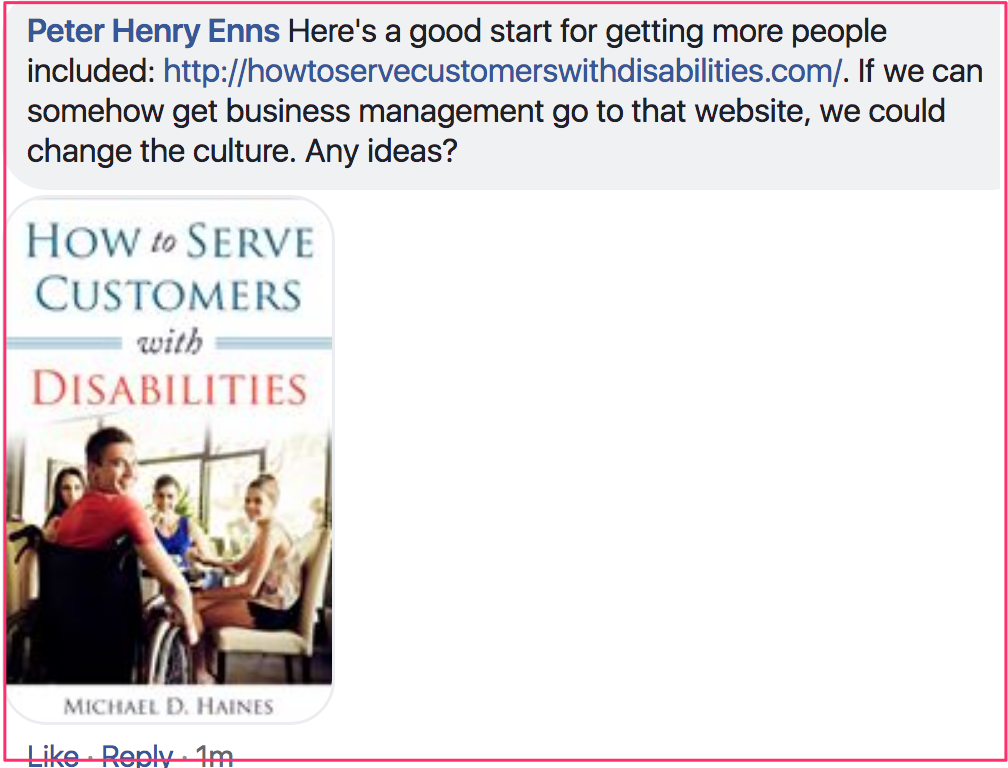
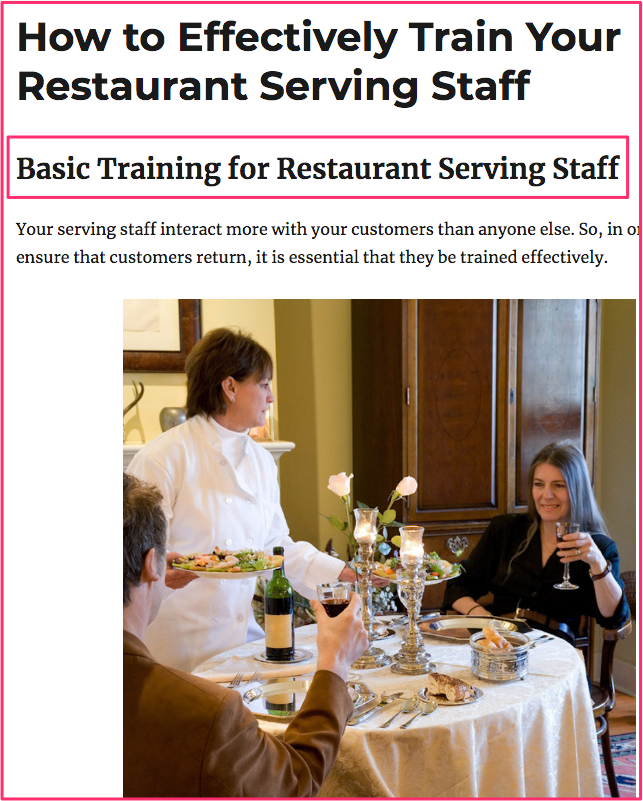
 The sample quiz and Facebook ad on this page represents a campaign to sell an e-book to restaurant managers. It is designed to help them train staff how to serve customers with disabilities.
The image above displays the first two of six questions of a quiz aimed at people who are general managers of restaurants. (Over 25,000 Facebook users in Canada list that as their occupation.)
 So, once the quiz has been created, you would go to the bottom of the left-hand column in your Facebook account. You would click on Create > Ad. When you get to the Detailed Targeting section, you would type “restaurant” in the Include box. Then you would click on Restaurant General Manager.
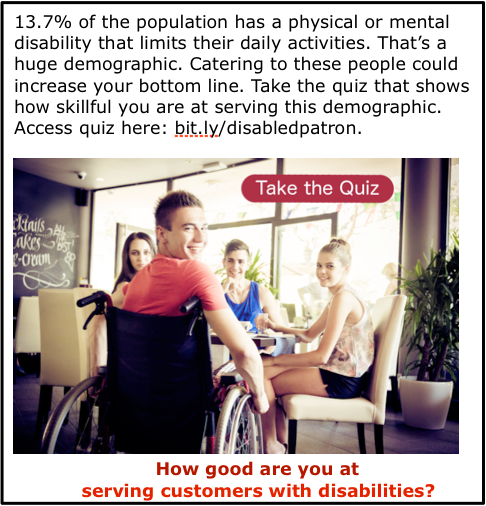
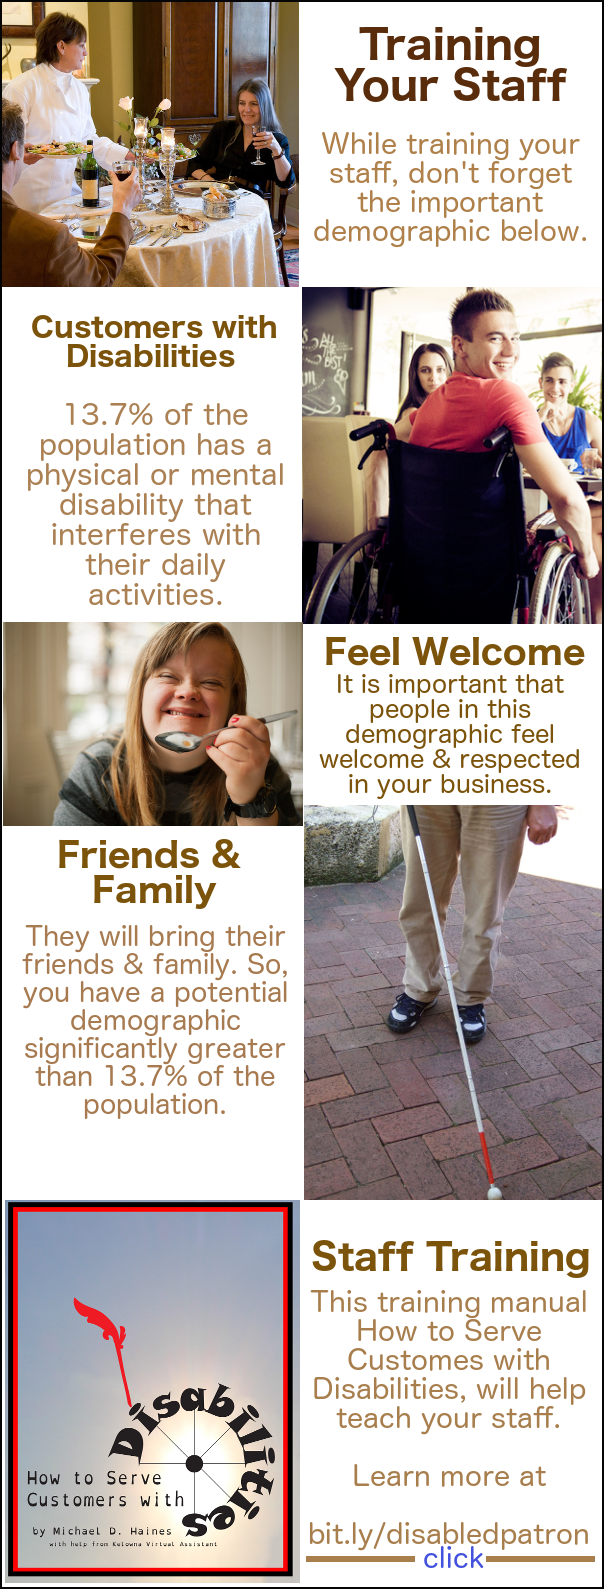
The preamble in your advertising says that 13.7% of Canadians have a disability that interferes with their daily life. This often includes going to restaurants that do not cater to people with disabilities very well.
So, the quiz users would show how smart they are by answering a number of questions that teach people a bit about how to cater to restaurant customers with disabilities. It they ace the quiz, they could very likely share the quiz with other restaurant managers they know.

Earn a percentage of the selling price for every book sold.
Click here to learn more.
Technical help
There a number of different companies that have the software available for creating a quiz. After lots of study, I decided to use Riddle. They have a excellent PDF file telling you just about everything you have to know about how to create online quizzes.
Important tips
 Think about the points below. I suspect they will help to make your quiz more effective.
- Before making your promotion public, time a friend while he/she is taking the quiz.
- It must take under 3 minutes.
- If any of the questions are confusing to your friend, change or eliminate them.
- Have a maximum of 10 questions.
- After someone answers each question,
- Set things up that immediately tells whether the answer is right or wrong.
- At the same time, give the right answer.
- Immediately after the last question & answer, tell them they can see a PDF file with much more background information about each question.
- In order to get that PDF file, they will have to fill in a very short form giving their name & email address. (See more below.)
- Have a short, punchy title.
- I used How to Increase Your Customer Base.
- The headline analyzer page will show you how to create headlines that get more views.
- Make sure you use an SSL certificate so that people can buy securely from your website.
- Make sure you track your various answers with Facebook pixels.
To get them to fill in a form and give their email addresses, you can write something like To read a detailed explanation of why each answer is the correct one, enter your first name & email address. We will immediately email you those explanations. You may want to use AWeber to email out those emails. That’s a better alternative than having someone hang around your email box 24 hours a day.
There is good statistical wisdom behind the above points. If you decide to deviate from any of those points, make sure you read over the Quizmaster PDF file before doing so.
Before using Riddle
Before using Riddle or whatever quiz-creation program you are using, create
- a quiz using Word or Pages
- a website used to promote the product you want to sell
- To see an example of such a website, go to bit.ly/disabledpatron.
- That website is built around an e-book it is selling.
- On that website, have a PDF file that people go to in order to read the rationale behind the quiz answers. (See next paragraph.)
- This is part of the email address collecting process.
PDF into web page — I want to have the PDF file in a web page where I’m featuring the product that the quiz is promoting. The PDF file gives more data elaborating on each of the questions.
I use Apple Pages. If you use Word, you will have to adjust the points below a bit.
Write the information for your quiz user in a Pages or Word File. Create the new PDF file using something like the Pages File > Export.
Then go to PDF2Go to compress the PDF file. Save it using only letter and numbers with NO spaces.
 Start by saving it in your Finder as a file with no spaces. Then drag that re-named file onto the PDF2GO page. Click the Save button at the bottom. Then click green Download button.
Go to the appropriate WPmadesimple.org page for the rest of the instructions.
View the page that has the new PDF link. Click on the link. The target page is the page URL that AWeber will send to the people who filled out the form. E.g., you would use WPmadesimple to add the PDF file link to this page. Then you would click that link to get to the final PDF page. Quiz users would be willing to give their email addresses so that they could see that final PDF page.
Technical part of creating the quiz
- Create quiz questions and answers and also the PDF page before starting technical part
- Go to riddle.com.
 If you have already signed up, click on the Dashboard link in the horizontal menu.
 To begin creating a brand new quiz, click Create in the horizontal menu.
- If you have not signed up yet, click the green button below “free for 14 days”.
 Click the Create link in the horizontal menu.
- Click the turquois Quiz icon.
- Give your quiz a short catchy title.
- Click on the letter “i” beside image to get the sizes of image from which to choose.
- Ideally each quiz question will have a picture beside it. Each picture in the quiz must be the same shape. (Landscape, portrait or square.)
- Choose a picture that relates to your title.
- Fill in an image, a title that whets their appetite and a description that makes the reader want to learn more.
- Click Question 1 blue button.
- Add image to match question if you can.
- Copy & paste the question from your Pages file.
- You can click Add an Answer button for more choices.
- Have a maximum of 4 choices.
- Click radio button of correct answer.
- Click Save button near top middle.
- Click plus sign below Question 1 blue button
- Make question and answer #2.
- Have no more than 10 questions.
- Quiz must take less than 3 minutes.
 Click on Score 0% – 50% button.
- Have maximum of 4 of these buttons.
- Use interesting language to describe quiz users in each range of number correct.
Immediately after last question…
Insert a lead generation form.
If you are using Riddle:
 Click on the Collect Leads button after you finished creating the last question & answer.
- Then click on Lead Generation Form.
- Click on 2. Connect button.
 Click the Connect to AWeber button.
- Click on green button to get authorization code.
- Paste authorization code into box & click on Connect AWeber.
- You will get an email saying you’ve connected Riddle to your AWeber account.
 You will see a number of fields that could go into your form.
- Click Customize link to do things such as change colour of buttons and fonts.
- Click tiny blue save button at the top.
- Click Advanced button to do things such as adding a Facebook pixel.
Notes on the above bullet points
AWeber
- If you want AWeber to automatically send out your emails as soon as someone has filled out a form, click the Connect to AWeber button.
You can use MailChimp instead of AWeber. I talk about AWeber because it is the only email forwarding company I’ve every used and I am very pleased with it. Besides that, I get a small amount of money if you pay for AWeber.
AWeber is one of the most widely used email automation marketing tools on the market today. If you use the process above, AWeber and Riddle will be integrated to make the whole process of collecting leads and quiz responses an intuitive and quick process.
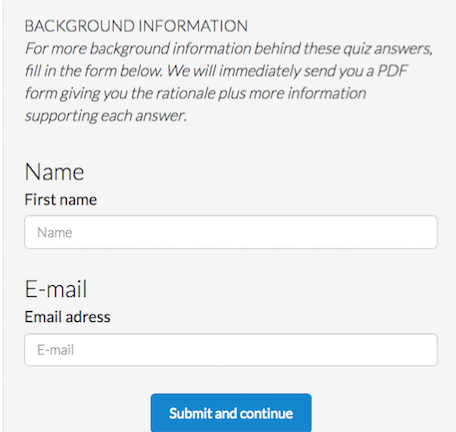
Form Intro
Here you insert the text you use to entice the quiz taker into giving their email address. Right after the last question they will still be thinking about giving information. That is the ideal place to ask for their email address.
So, have some enticing text in the Description such as this: For more background information behind these quiz answers, fill in the form below. We will immediately send you a PDF form giving you the rationale plus more information supporting each answer.
For the Label you can have a very short title that would draw them into reading the Description. For instance, the italicized text above could have Background Information for the label.
They then fill in the form with their name & email address. That data will go to AWeber. That company will in turn email the quiz user whatever PDF file you gave them.
Campaigns
Campaigns is the AWeber platform that automates sending emails to the right person at the right time.
Learn more: How to get started with Campaigns.
Selling a product
In the example on this page we will be earning our money by selling a high quality e-book about serving people with disabilities. To promote the product, a website appealing to the target audience (restaurant general managers) was created.
 The financial benefit of a restaurant general manager having the e-book would be increased sales. The manager would use the information for staff training. People with disabilities would have more pleasant experiences in the restaurant. They would frequent the restaurant more often as would their friends and families.
In order to make the website more appealing, it would be about more than just customers with disabilities. It would be about how to increase your restaurant sales. So, the domain name howtoincreaseyourrestaurantsales.com was purchased.
I did not want the website to be only about serving people with disabilities. So, it also includes a section on where to get free software to help people order online and also reserve a table.
I want to send people to the most important page on the website. So, I used an URL shortener to make it easier to deal with. For instance, people can now go to https://howtoincreaseyourrestaurantsales.com/disabilities-introduction/ by simply typing bit.ly/disabledpatron into a browser window.
Attached PDF file
You may be offering the visitors an e-book in the form of a PDF file. That is what I am doing for How to Serve Customers with Disabilities e-book. I will be hosting it in Google Drive.
The e-book was created using Microsoft Word. I took the final version of the e-book and, in Microsoft Word, clicked on File > Save As. For the saving location I chose a folder in Google Drive. For the file format I selected PDF.
More information about attaching a PDF file
Adding a link into an AWeber message
Connecting your AWeber account to your Riddle account
Creating messages to be sent to subscribers
Hosting a PDF file on Google drive
Message sent out as soon as email is received
Glossary
List — The way that you differentiate messages and subscribers from others in your AWeber account. For example, you may have a quiz about a pet grooming business. From the quiz answers you could tell whether someone was mainly interested in dogs or cats. So, one subscribers’ list at AWeber would be about dogs and another would be about cats.
Tag — One element of a subscriber’s information. For instance, you might have a quiz about favourite categories of foods. The category could determine what kind of information you would send the each person. The categories would be called “tags”. One person’s tag could be fruit. Another person’s tag could be vegetables.
You would send these tags to AWeber. Then, when the emails are sent out, there could be a different email for each tag.
Read the article about how to use tags with AWeber campaigns.

 There is a petition going around Canada demanding that the RCMP arrest Prime Minister Justin Trudeau for treason. Emails & social media send people to the Petitions24 website. The main web page begins with the 4 paragraphs below.
 Watch the TED talk called Is the world getting better or worse? A look at the numbers.
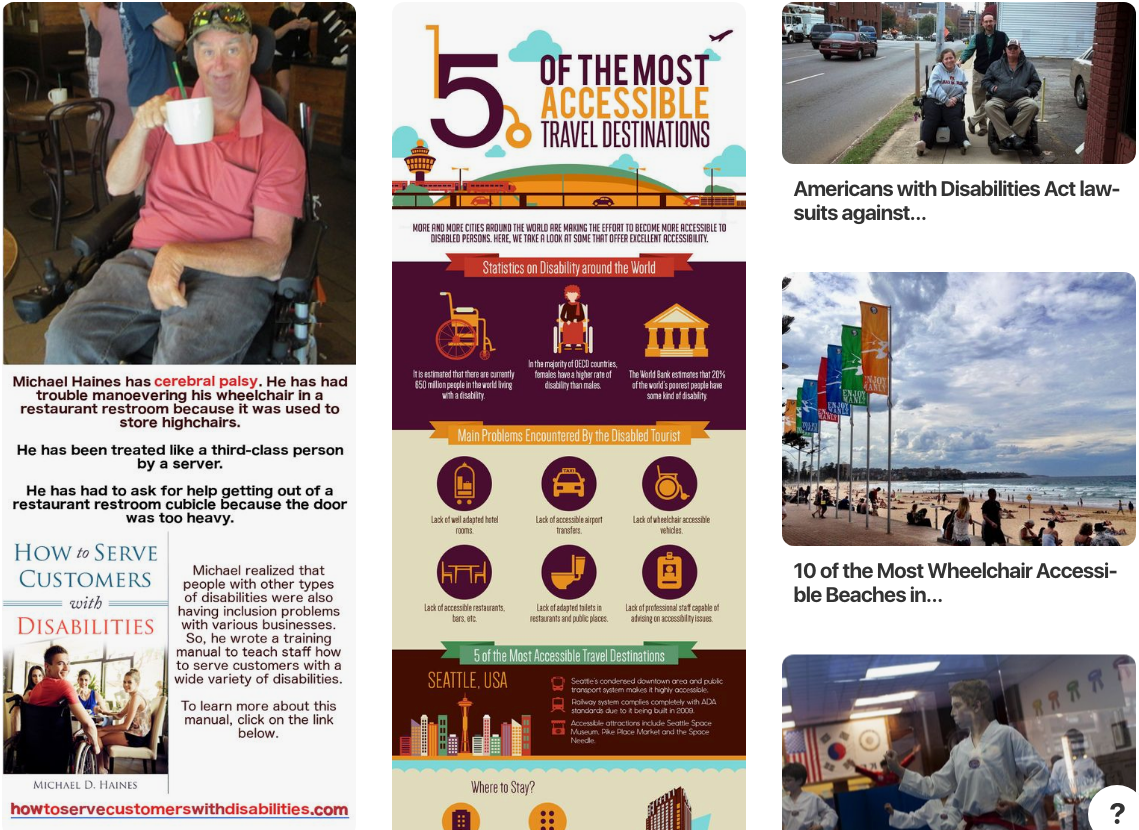 When pinning a new pin for the first time, it is best to source your pin from within Pinterest. You want to let Pinterest know how popular your new pin is.
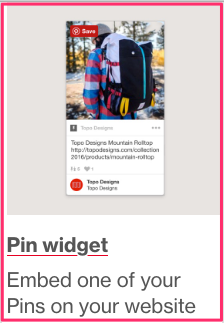 If you are not there already, go to the
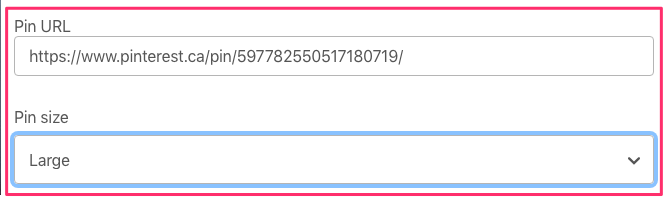
 I came across
 Twitter allows people to have animated GIFs with their tweets. So, I will use one I created with

 previous and completely forgotten about.
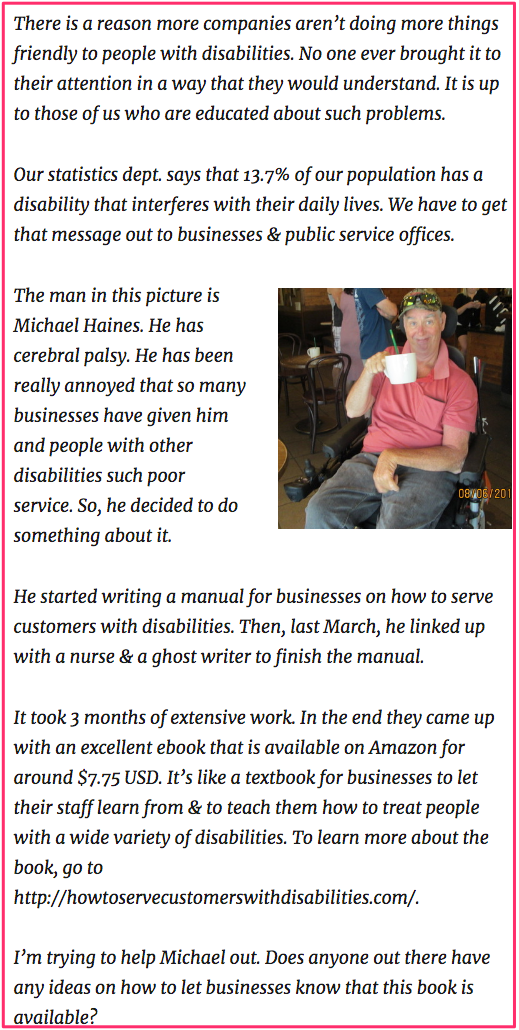


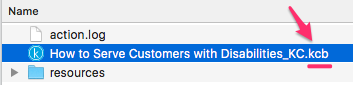 Note that the KCB file mentioned above is in the KC folder.


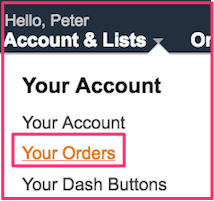
 Have a graphic on Facebook along with a thank you to the people who have given reviews. Tell them how long the ebook will still be free. Go to Amazon’s Your Account > Your Orders to see if anyone has downloaded the free ebook. If so, mention that statistic also.
 I came across a fascinating website today. It’s about what they call the
 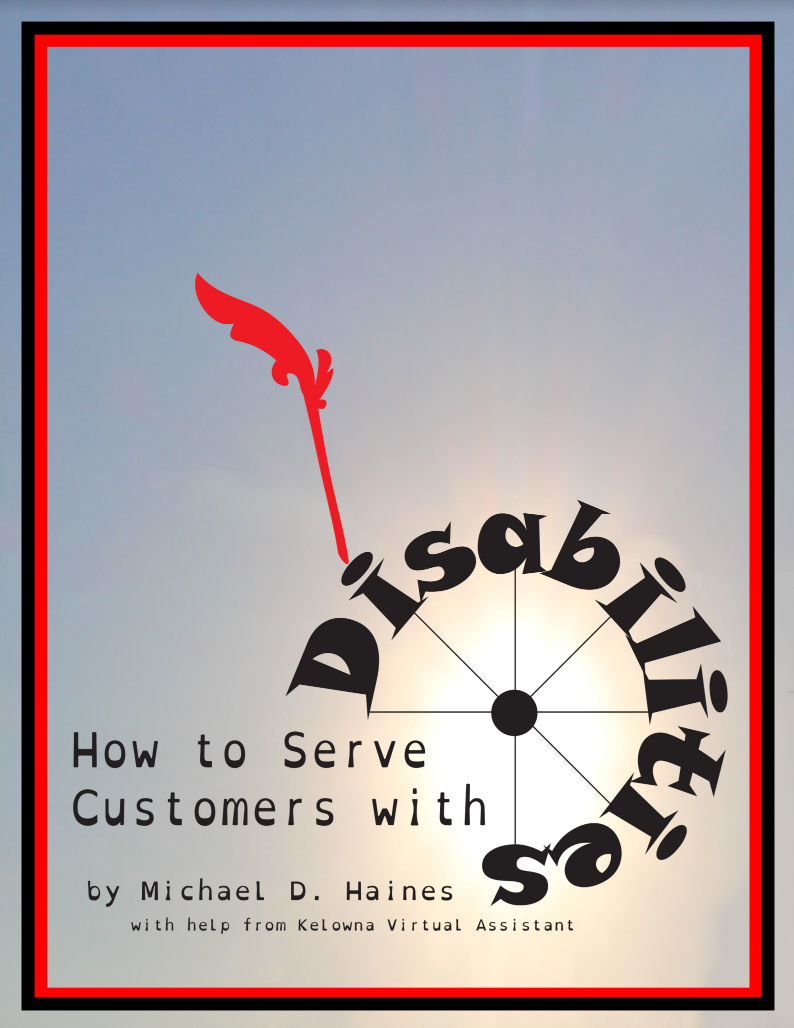 I sell a training manual called
 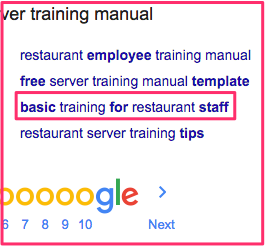 I decided that the most useful phrase of the 4 above phrases was Restaurant employee training manual. So, I went to Google.com and entered the above phrase into the search box. The SERP (search engine results page) had 8 search results at the bottom.
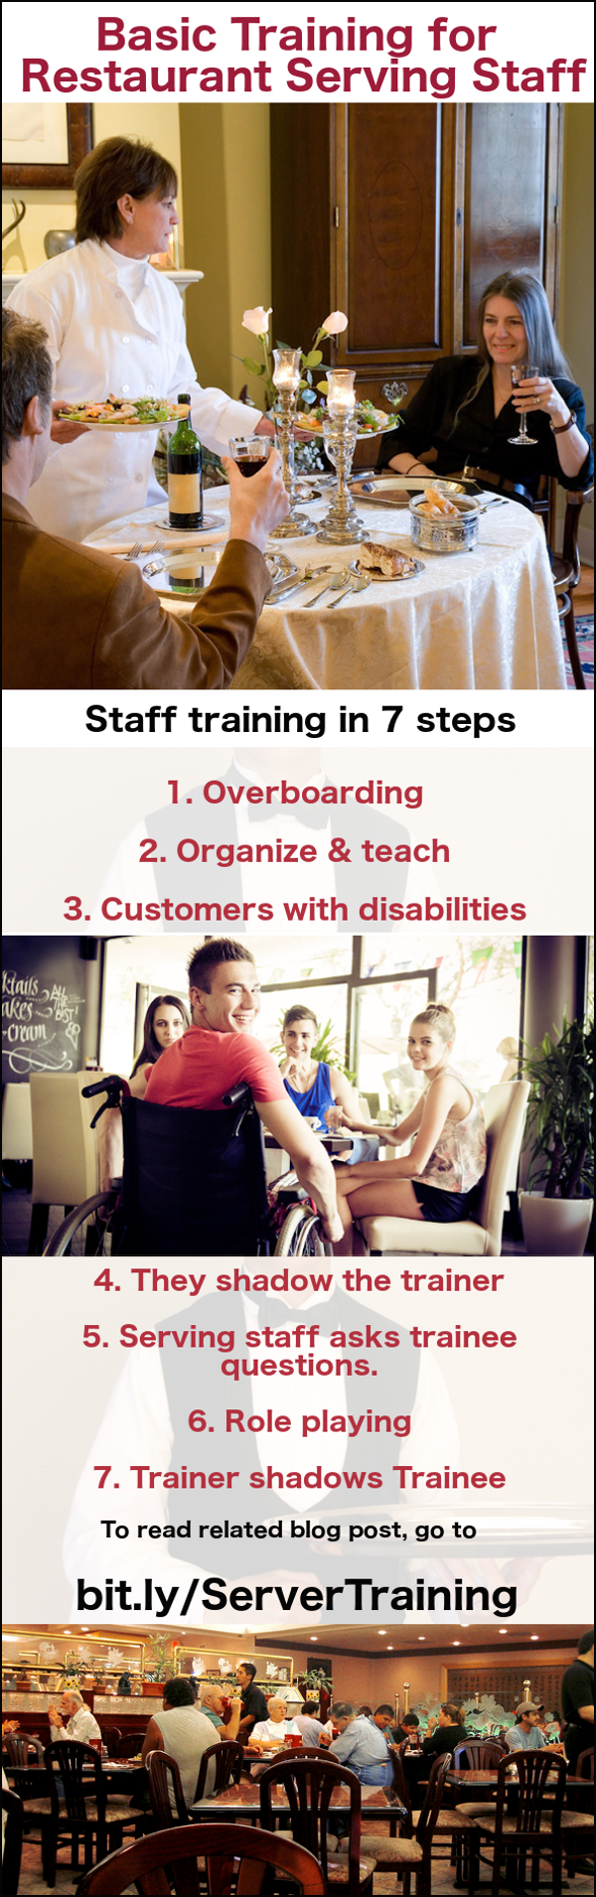
 Find group boards in your niche. Contact the owners and ask if they want to work together and share content. After I’ve found a few of these cooperative group boards, post to each one
 Click the turquoise Quiz icon
 Give your quiz a title.
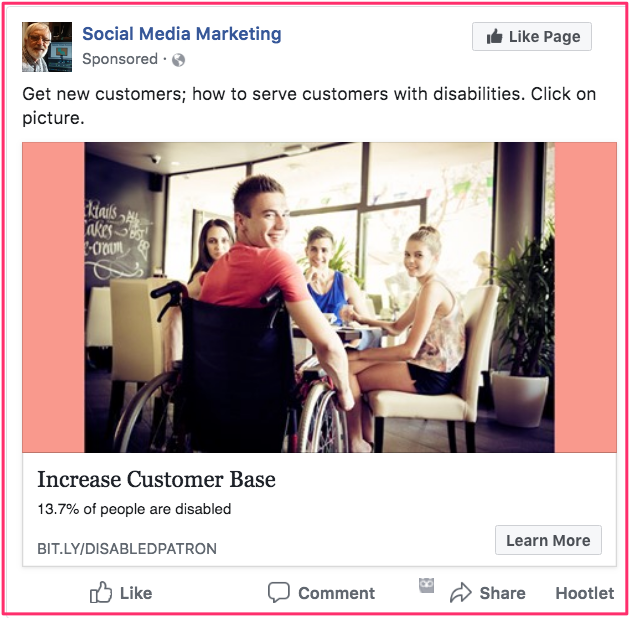 To succeed in Facebook advertising, you must have:
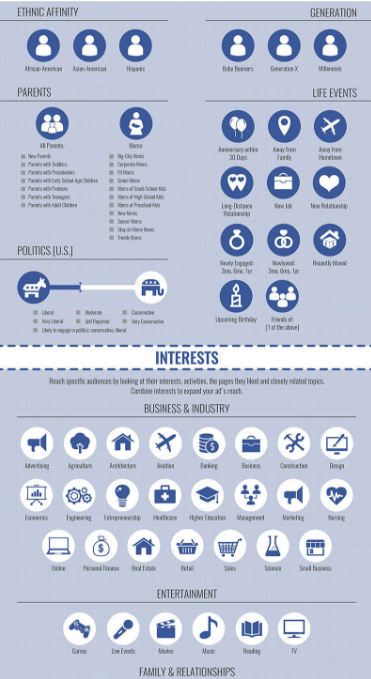 With the right combination of interests, behaviours & location, you can drill down to as low as one person in your target audience.
 Note that targeting audiences is not an exact science. Facebook is not able to obtain all of the correct data. So, targeting involves a certain amount of guess work.
 I opened Facebook and went to Create > Ad near the lower left-hand corner.
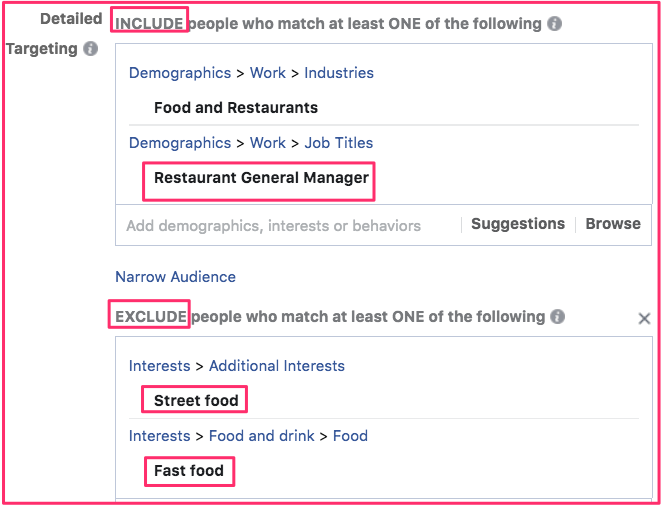 Under Detailed Targeting, I typed in restaurant manager. That gave me 3 options. I clicked on Restaurant General Manager. For reasons that seem illogical to me, that restricted my potential reach too much. So, I had to add another option.
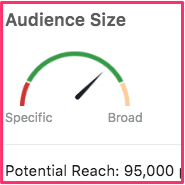 By including more categories, you increase your potential audience. By excluding, you make it more specific. It is best to keep your targeting narrow rather than being broad. Narrower audiences are often easier to reach on a limited budget and are
 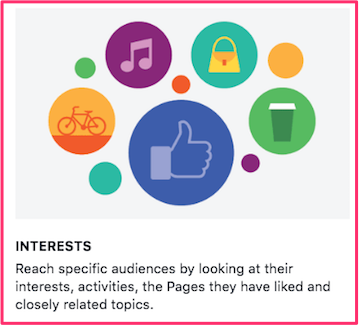 interests. This can be as finely targeted as the type of pages they “liked”.
 There are other categories that you could include or exclude for your audience. To decide what to do, hover over the letter i. (See graphic above.) That will give you a definition of the category. Use that knowledge to help you decide whether to include or exclude people in that category.
 A mediocre image will not do. You have to get a picture that tells a story.
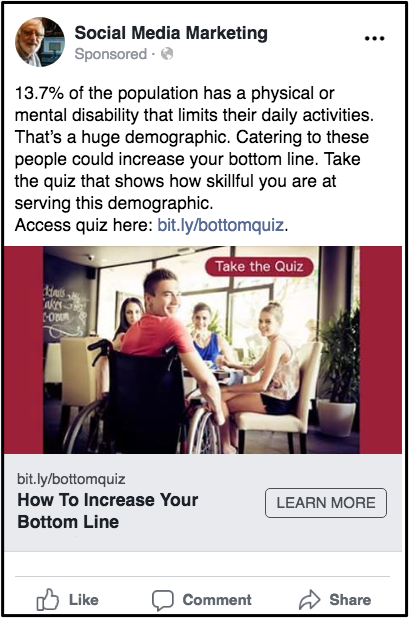

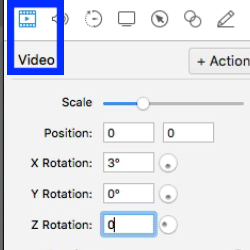 After you get home, you open the MP4 files in Google Drive. And some of your videos are sideways. If you have ScreenFlow, there is a simple way to rotate those clips.